Backing up your iPad is crucial for safeguarding your valuable data and ensuring its easy recovery in case of device issues or data loss. This article provides a comprehensive overview of iPad backup options, focusing on using iTunes or Finder to back up your iPad to a Mac. It outlines the step-by-step process for connecting your iPad to a Mac and initiating the backup using both iTunes and Finder. The article also compares the advantages and disadvantages of each backup method, helping you choose the right option for your needs. Additionally, it addresses common backup issues and provides troubleshooting tips to ensure a successful backup process. By regularly backing up your iPad and following the recommended best practices, you can ensure the safety and security of your data.
Understanding iPad Backup Options
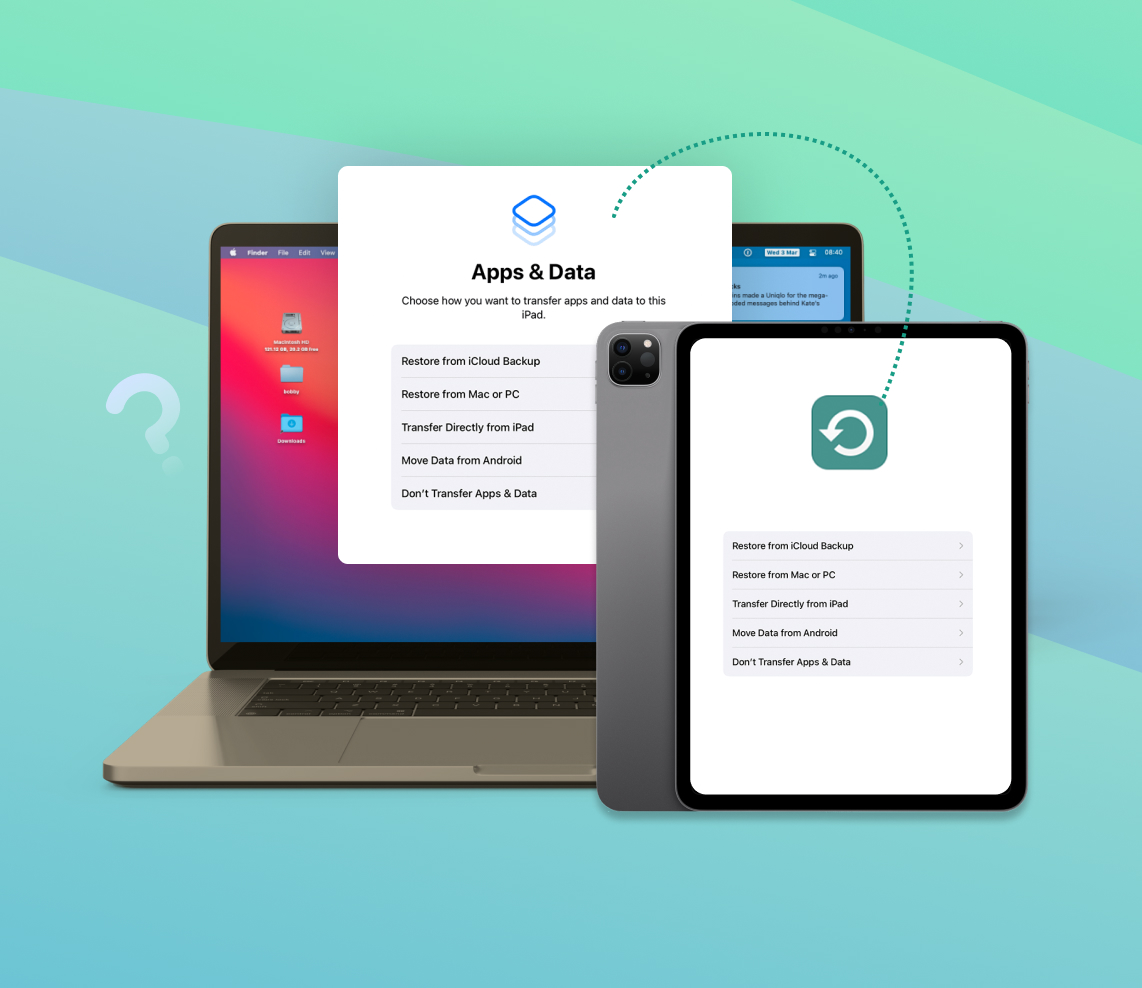
Backing up your iPad is essential for preserving your important data and ensuring it can be easily restored in case of device issues or data loss. Apple offers several backup options for iPad users, including the ability to back up directly to a Mac using iTunes or Finder.
iTunes: With iTunes, the multimedia management software developed by Apple, you can back up your iPad to your Mac. This option allows you to save your iPad’s settings, app data, and documents. However, media files that are already stored in your iTunes library are not included in the backup.
Finder: If you’re using macOS Catalina (10.15) or later, Apple replaced iTunes with Finder for managing iOS devices. Finder provides a backup feature that allows you to back up your iPad to your Mac. Similar to iTunes backup, Finder backup includes your iPad’s settings, app data, and documents, but excludes media files stored in your iTunes library.
Regularly backing up your iPad is highly recommended to safeguard your data. By having a backup, you can easily restore your files and settings if your iPad is lost, damaged, or requires a factory reset. Additionally, creating multiple backups and storing them in different locations adds an extra layer of protection.
For detailed instructions on how to back up your iPad using iTunes or Finder, you can refer to the official Apple support documentation
Remember to prioritize the safety of your data by regularly backing up your iPad to ensure your valuable information remains secure.
Backing Up iPad to Mac using iTunes or Finder
Installing iTunes on Mac or using Finder (for macOS Catalina and later versions)
To back up your iPad to a Mac, you can either install iTunes or use Finder if you are running macOS Catalina or a later version. Here’s how you can get started:
- If you don’t have iTunes installed on your Mac, you can download it from the official Apple website: https://www.apple.com/itunes/download/.
- If you are using macOS Catalina or a later version, you can use Finder as an alternative to iTunes.
- Once you have downloaded iTunes or if you are using Finder, proceed to the next section to connect your iPad to the Mac.
Connecting iPad to Mac via USB
Before you can back up your iPad, you need to connect it to your Mac using a USB cable. Follow these steps:
- Locate the USB cable that came with your iPad.
- Connect one end of the USB cable to the Lightning or USB-C port on your iPad.
- Connect the other end of the USB cable to an available USB port on your Mac.
- Your iPad should now be connected to your Mac, and you are ready to proceed with the backup process.
Backing up iPad using iTunes or Finder
Now that your iPad is connected to your Mac, you can back it up using iTunes or Finder. Follow these steps:
Using iTunes:
- Launch iTunes on your Mac.
- In the top-left corner of the iTunes window, click on the iPad icon to access your device’s summary page.
- Under the “Backups” section, select “This computer” to ensure that the backup is saved locally on your Mac.
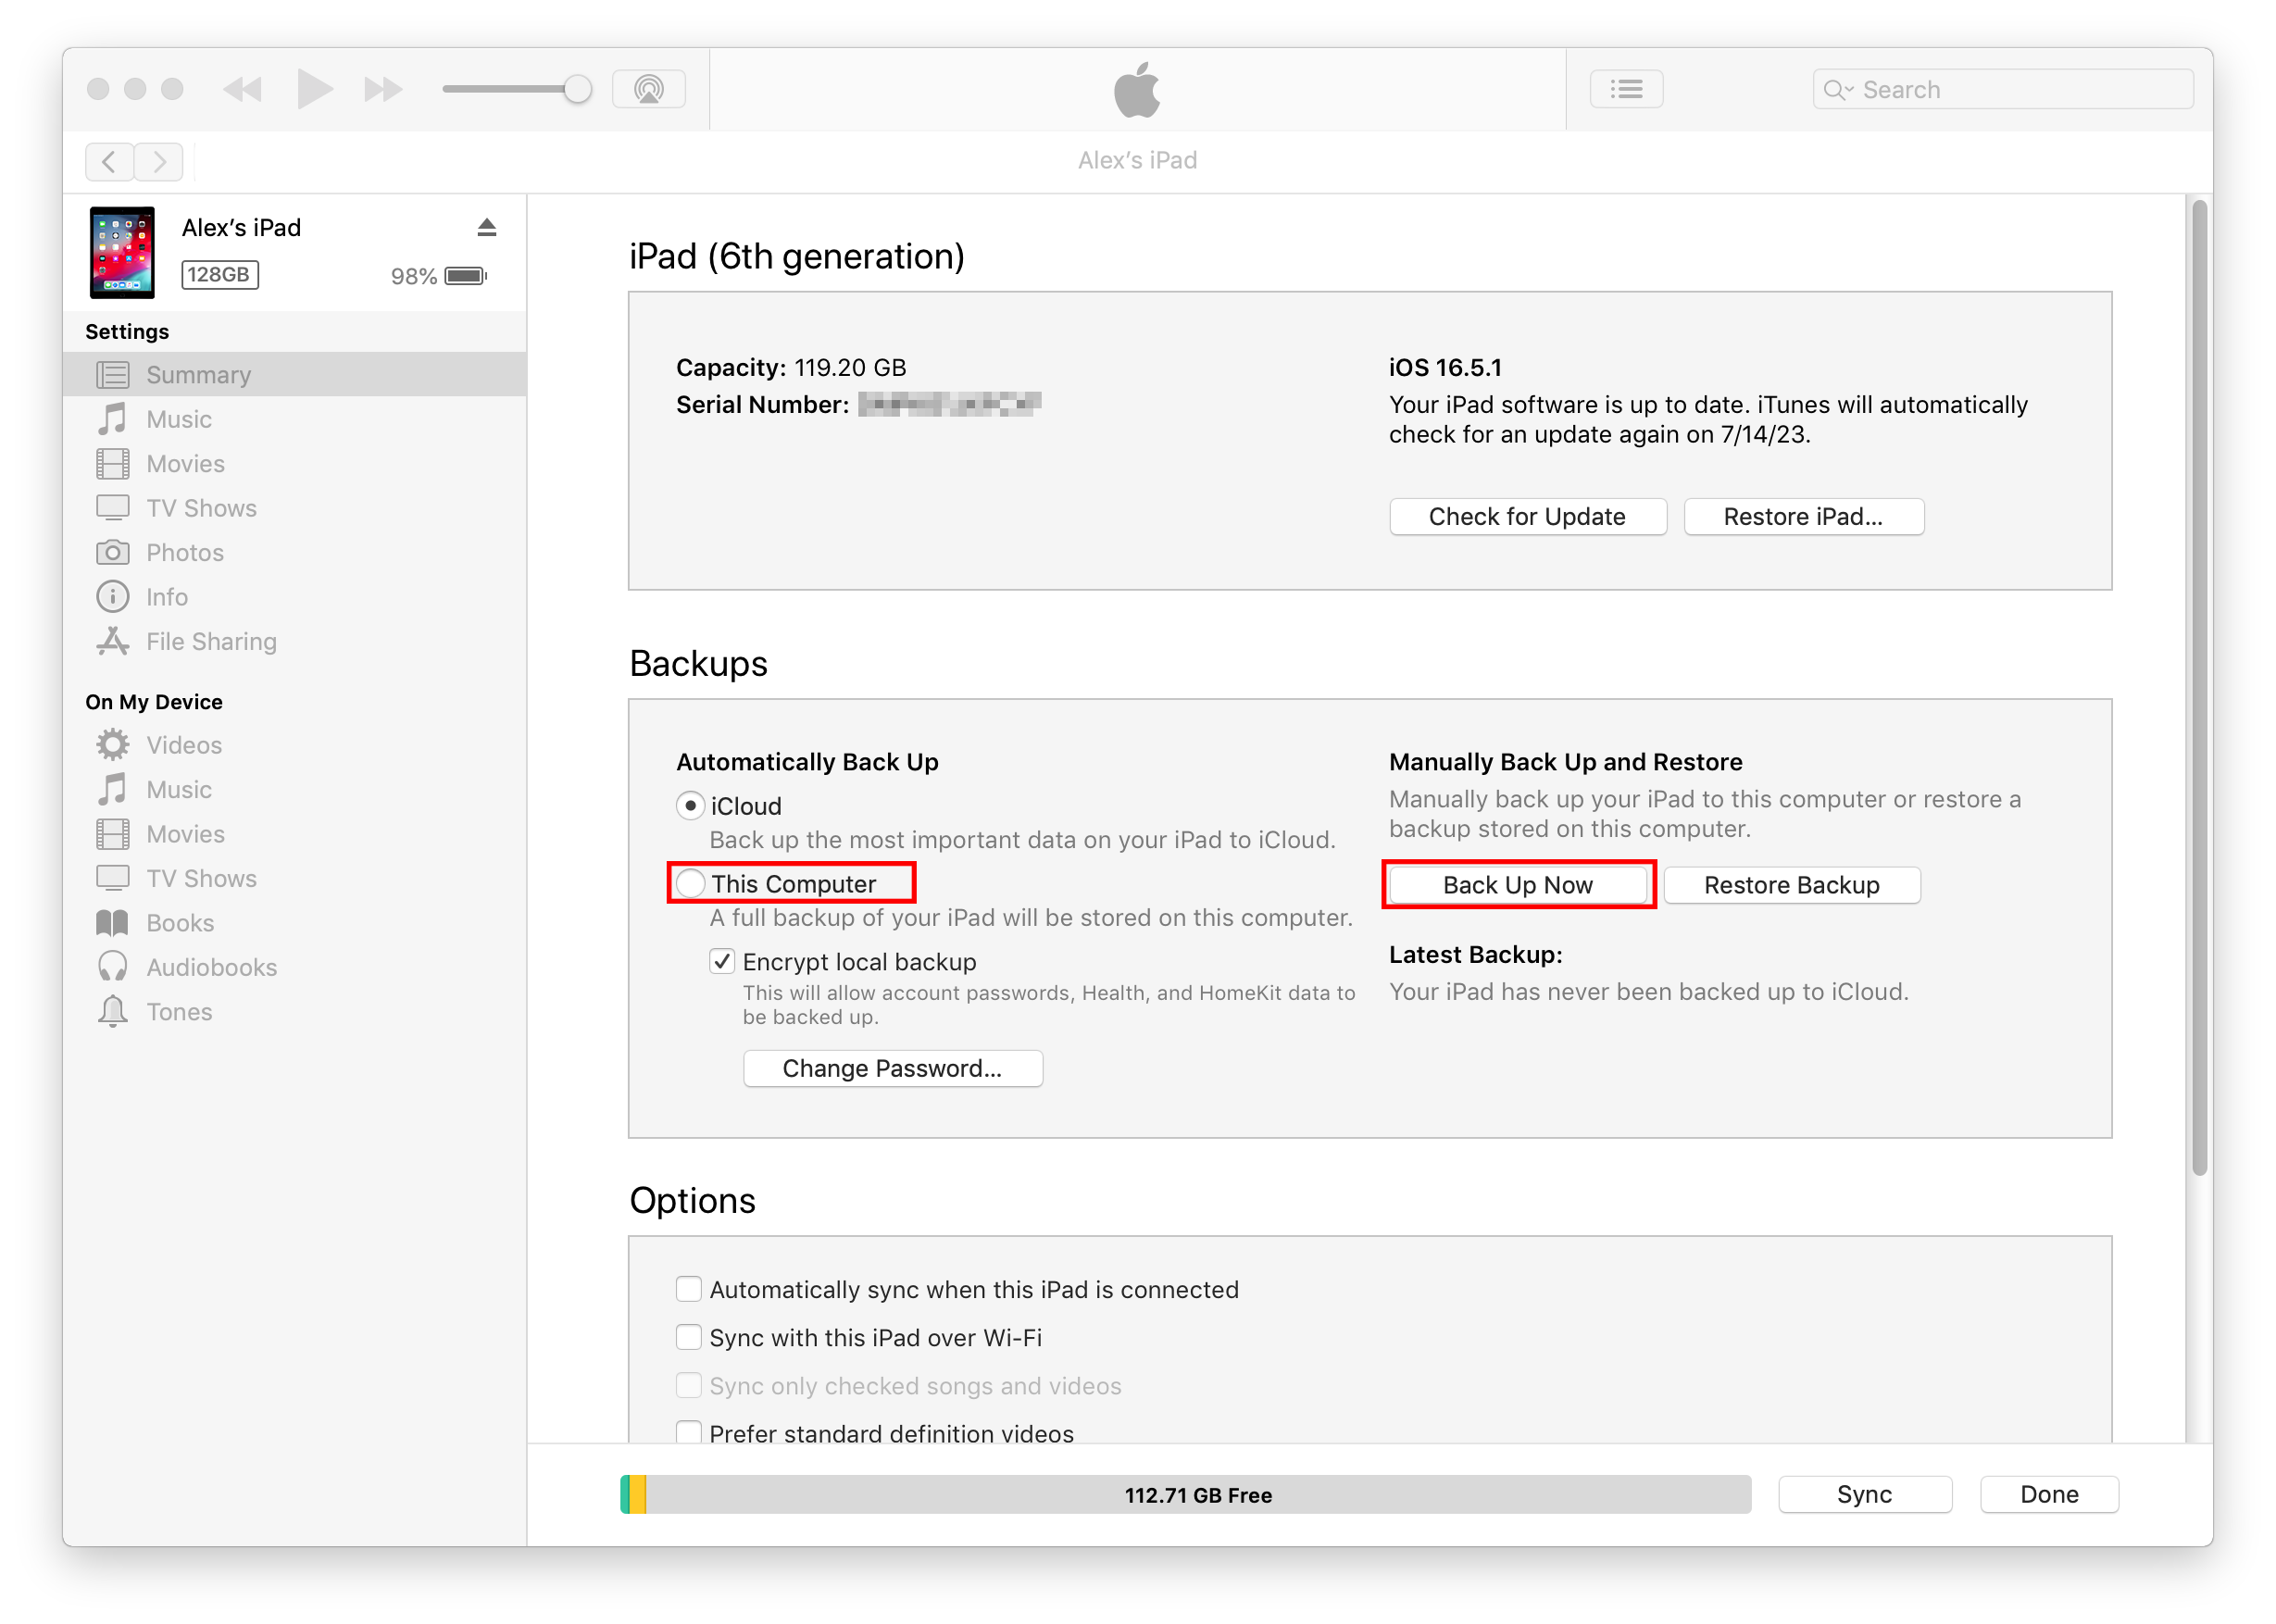
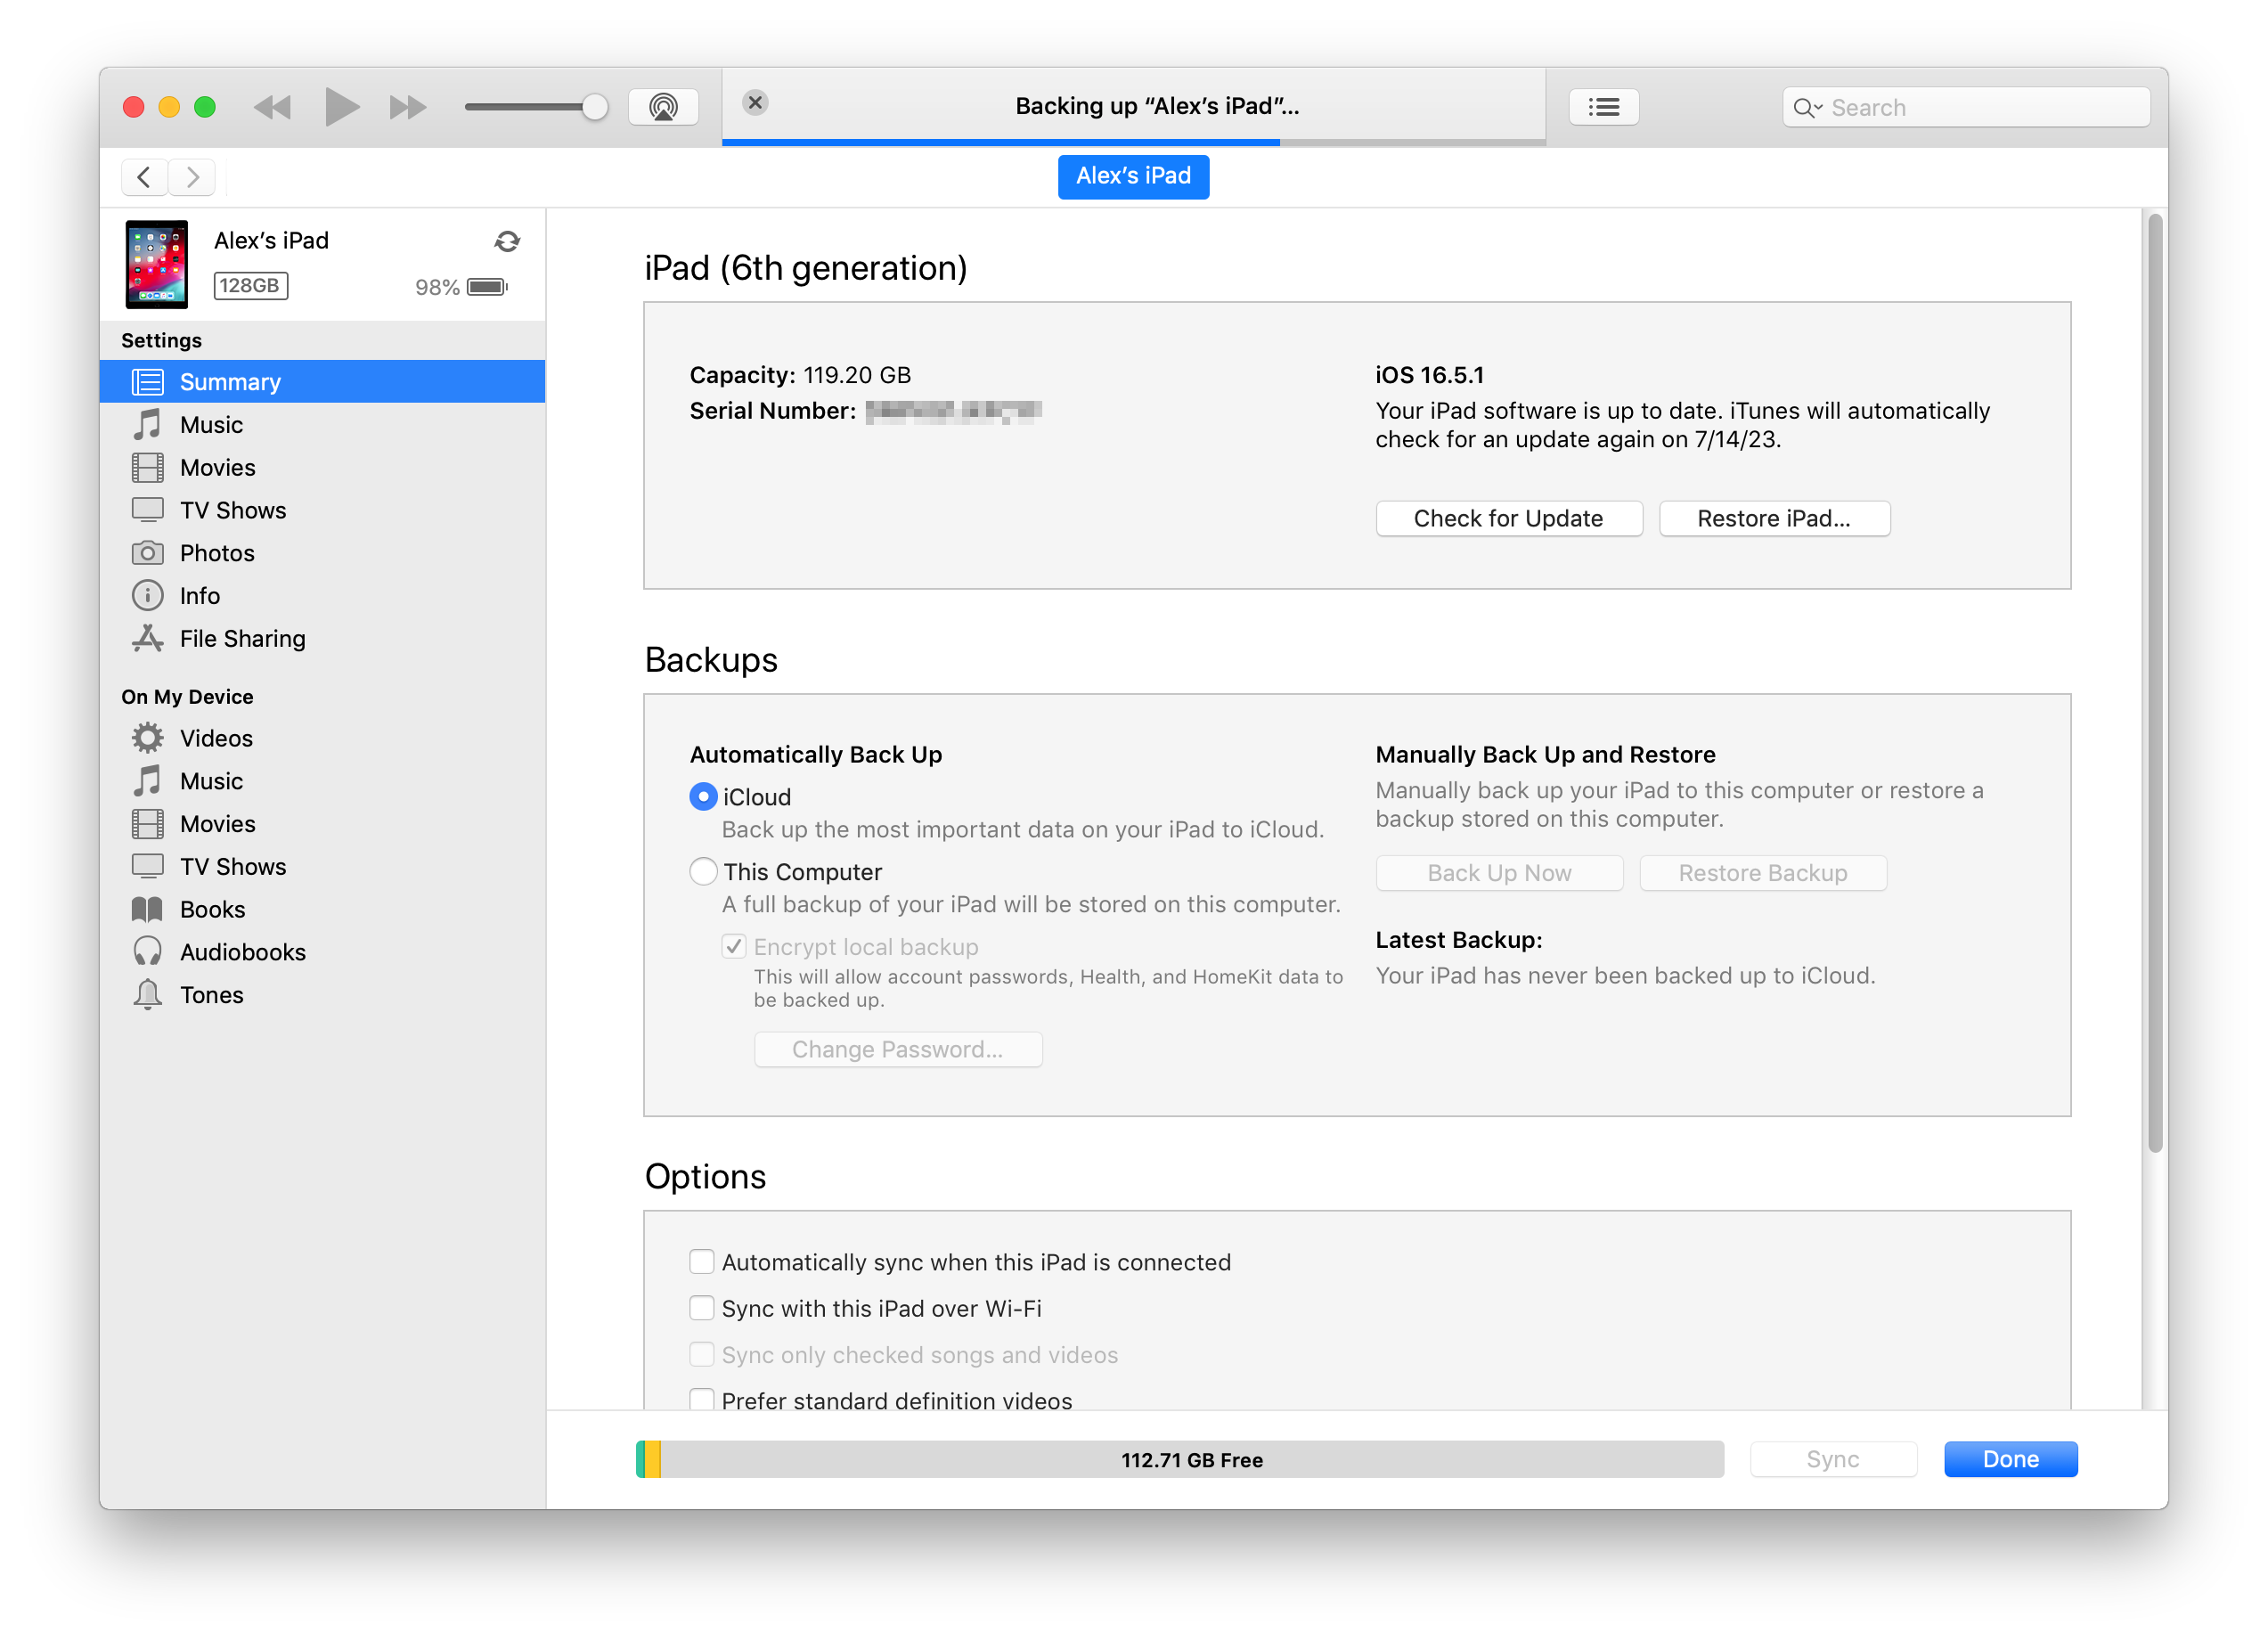
- Click on the “Back Up Now” button to initiate the backup process. iTunes will start creating a backup of your iPad’s data.
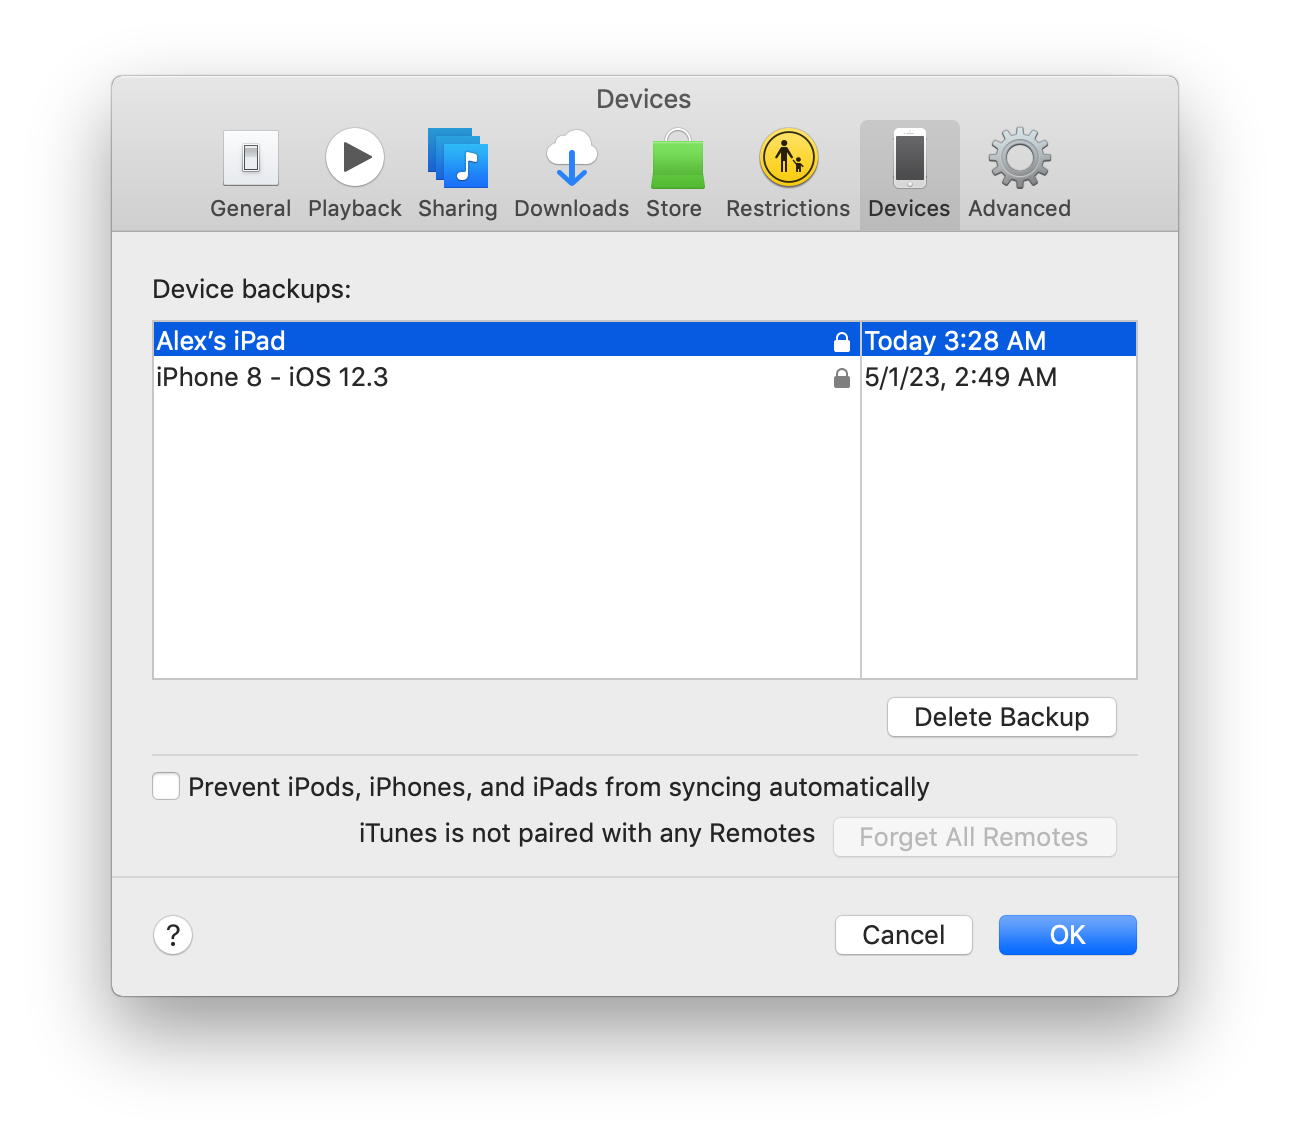
- Once the backup is complete, you can verify its success by going to iTunes preferences and selecting the “Devices” tab. The backup should be listed there with the date and time.
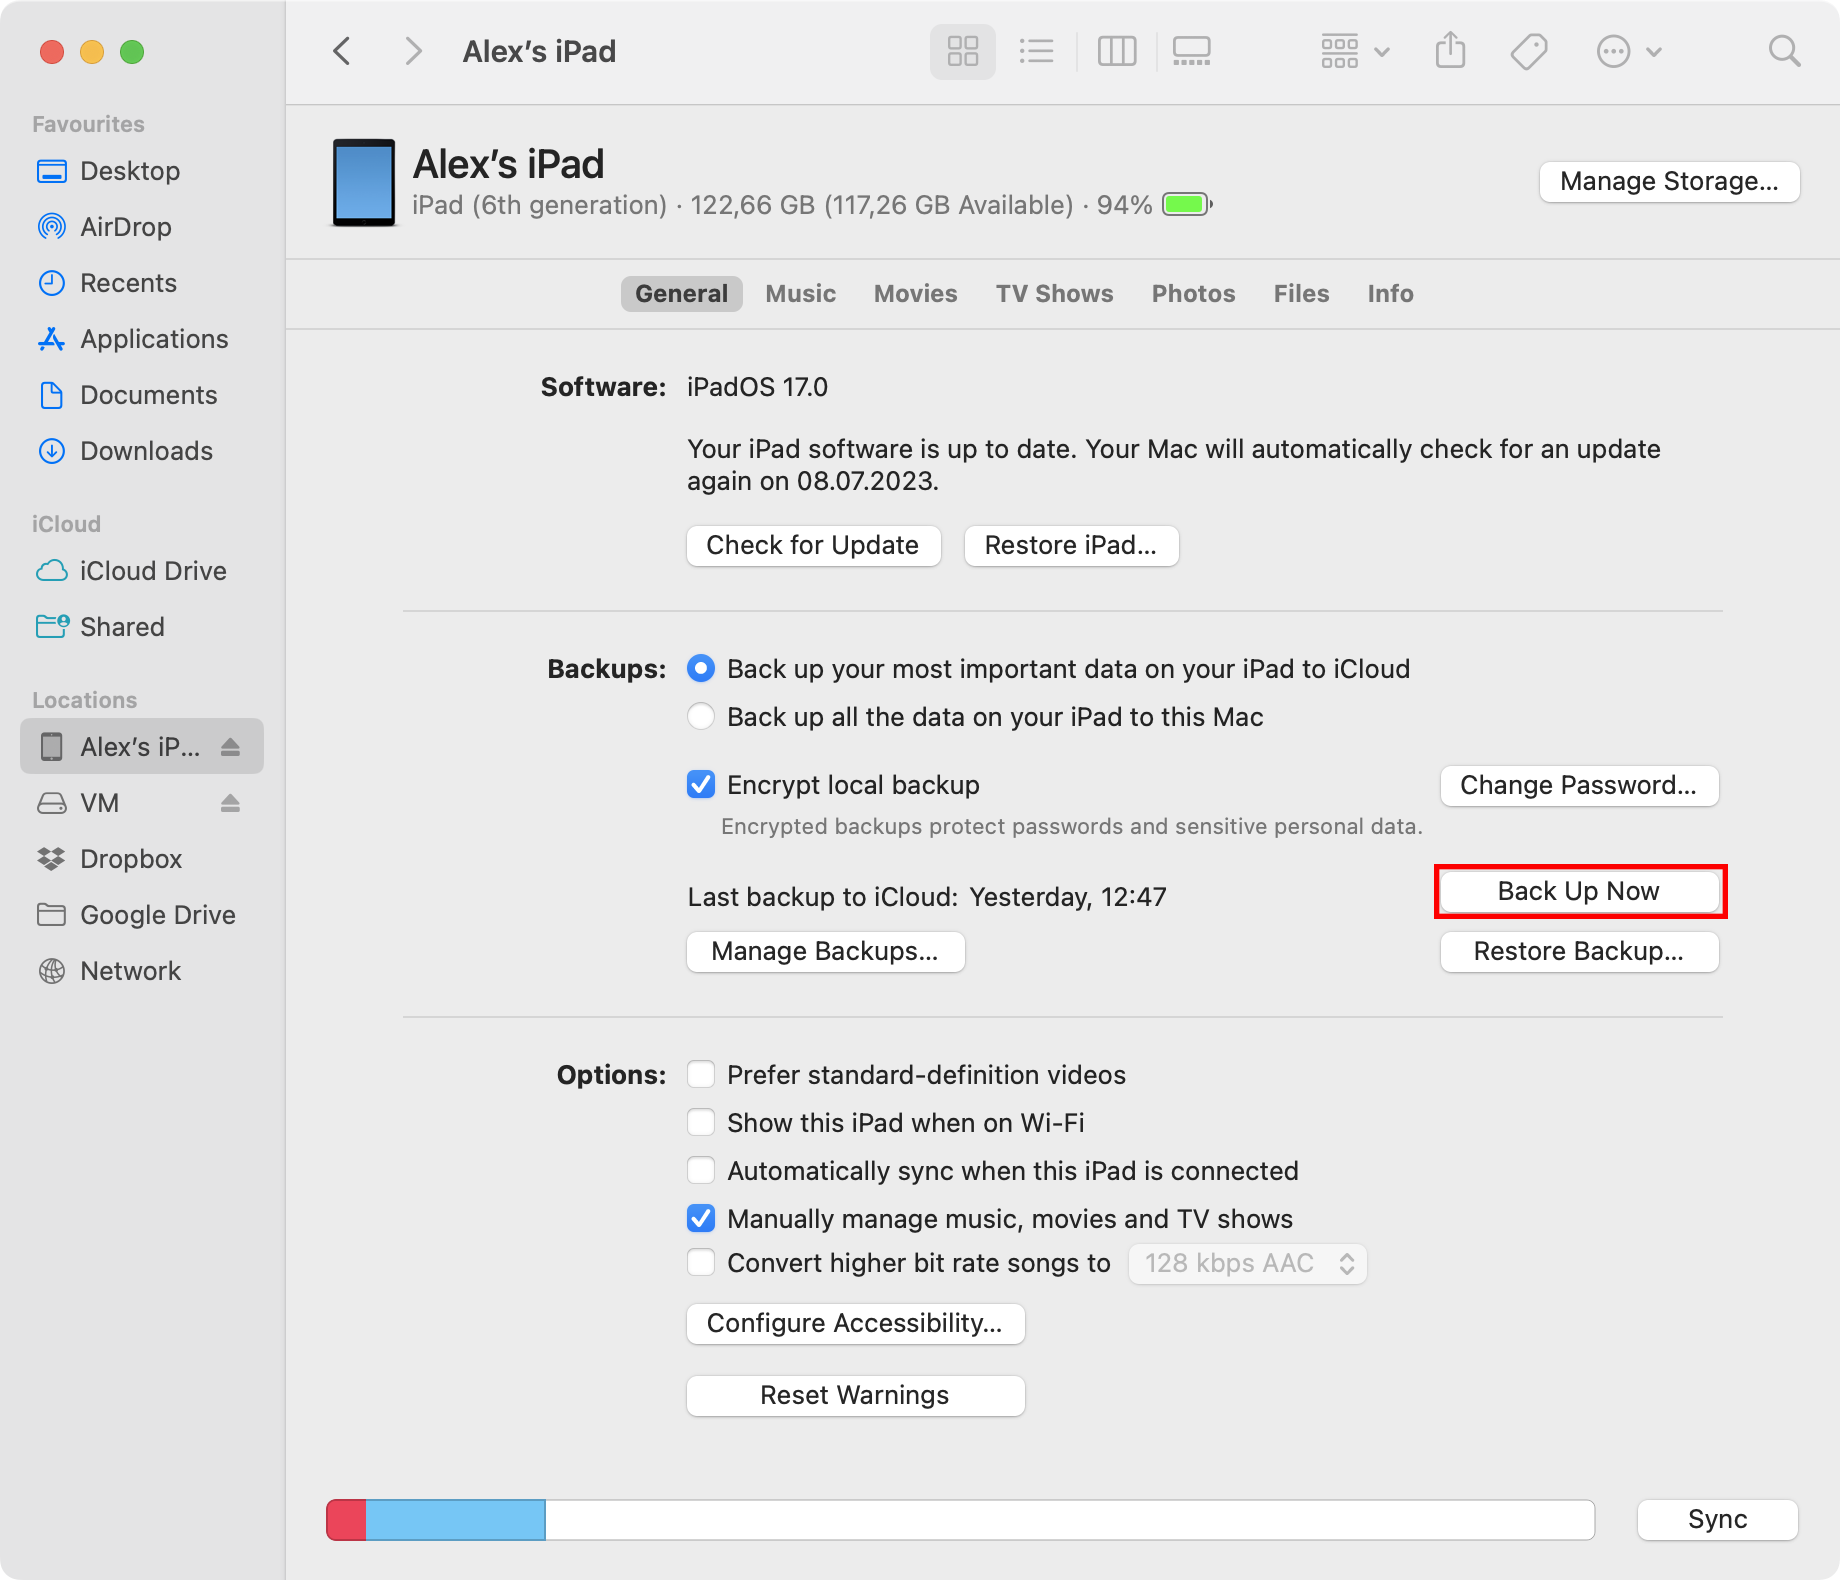
Using Finder:
- If you are using macOS Catalina or a later version, launch Finder on your Mac.
- In the Finder sidebar, click on your iPad under the “Locations” section.
- In the iPad’s Finder window, click on the “General” tab.
- Under the “Backups” section, click on the “Back Up Now” button to start the backup process. Finder will begin creating a backup of your iPad’s data.
- Once the backup is complete, you can check its status by going to Finder preferences and selecting the “Sidebar” tab. The backup should be listed there.

Accessing and managing iPad backups in iTunes or Finder
After you have successfully backed up your iPad to your Mac, you may need to access or manage the backups at a later time. Here’s how you can do it:
Using iTunes:
- Launch iTunes on your Mac.
- In the top-left corner of the iTunes window, click on the iPad icon to access your device’s summary page.
- Under the “Backups” section, click on the “Manage Backups” button.
- A new window will open, displaying all the backups associated with your iPad. From here, you can delete or restore backups as needed.
Using Finder:
- If you are using macOS Catalina or a later version, launch Finder on your Mac.
- In the Finder sidebar, click on your iPad under the “Locations” section.
- In the iPad’s Finder window, click on the “General” tab.
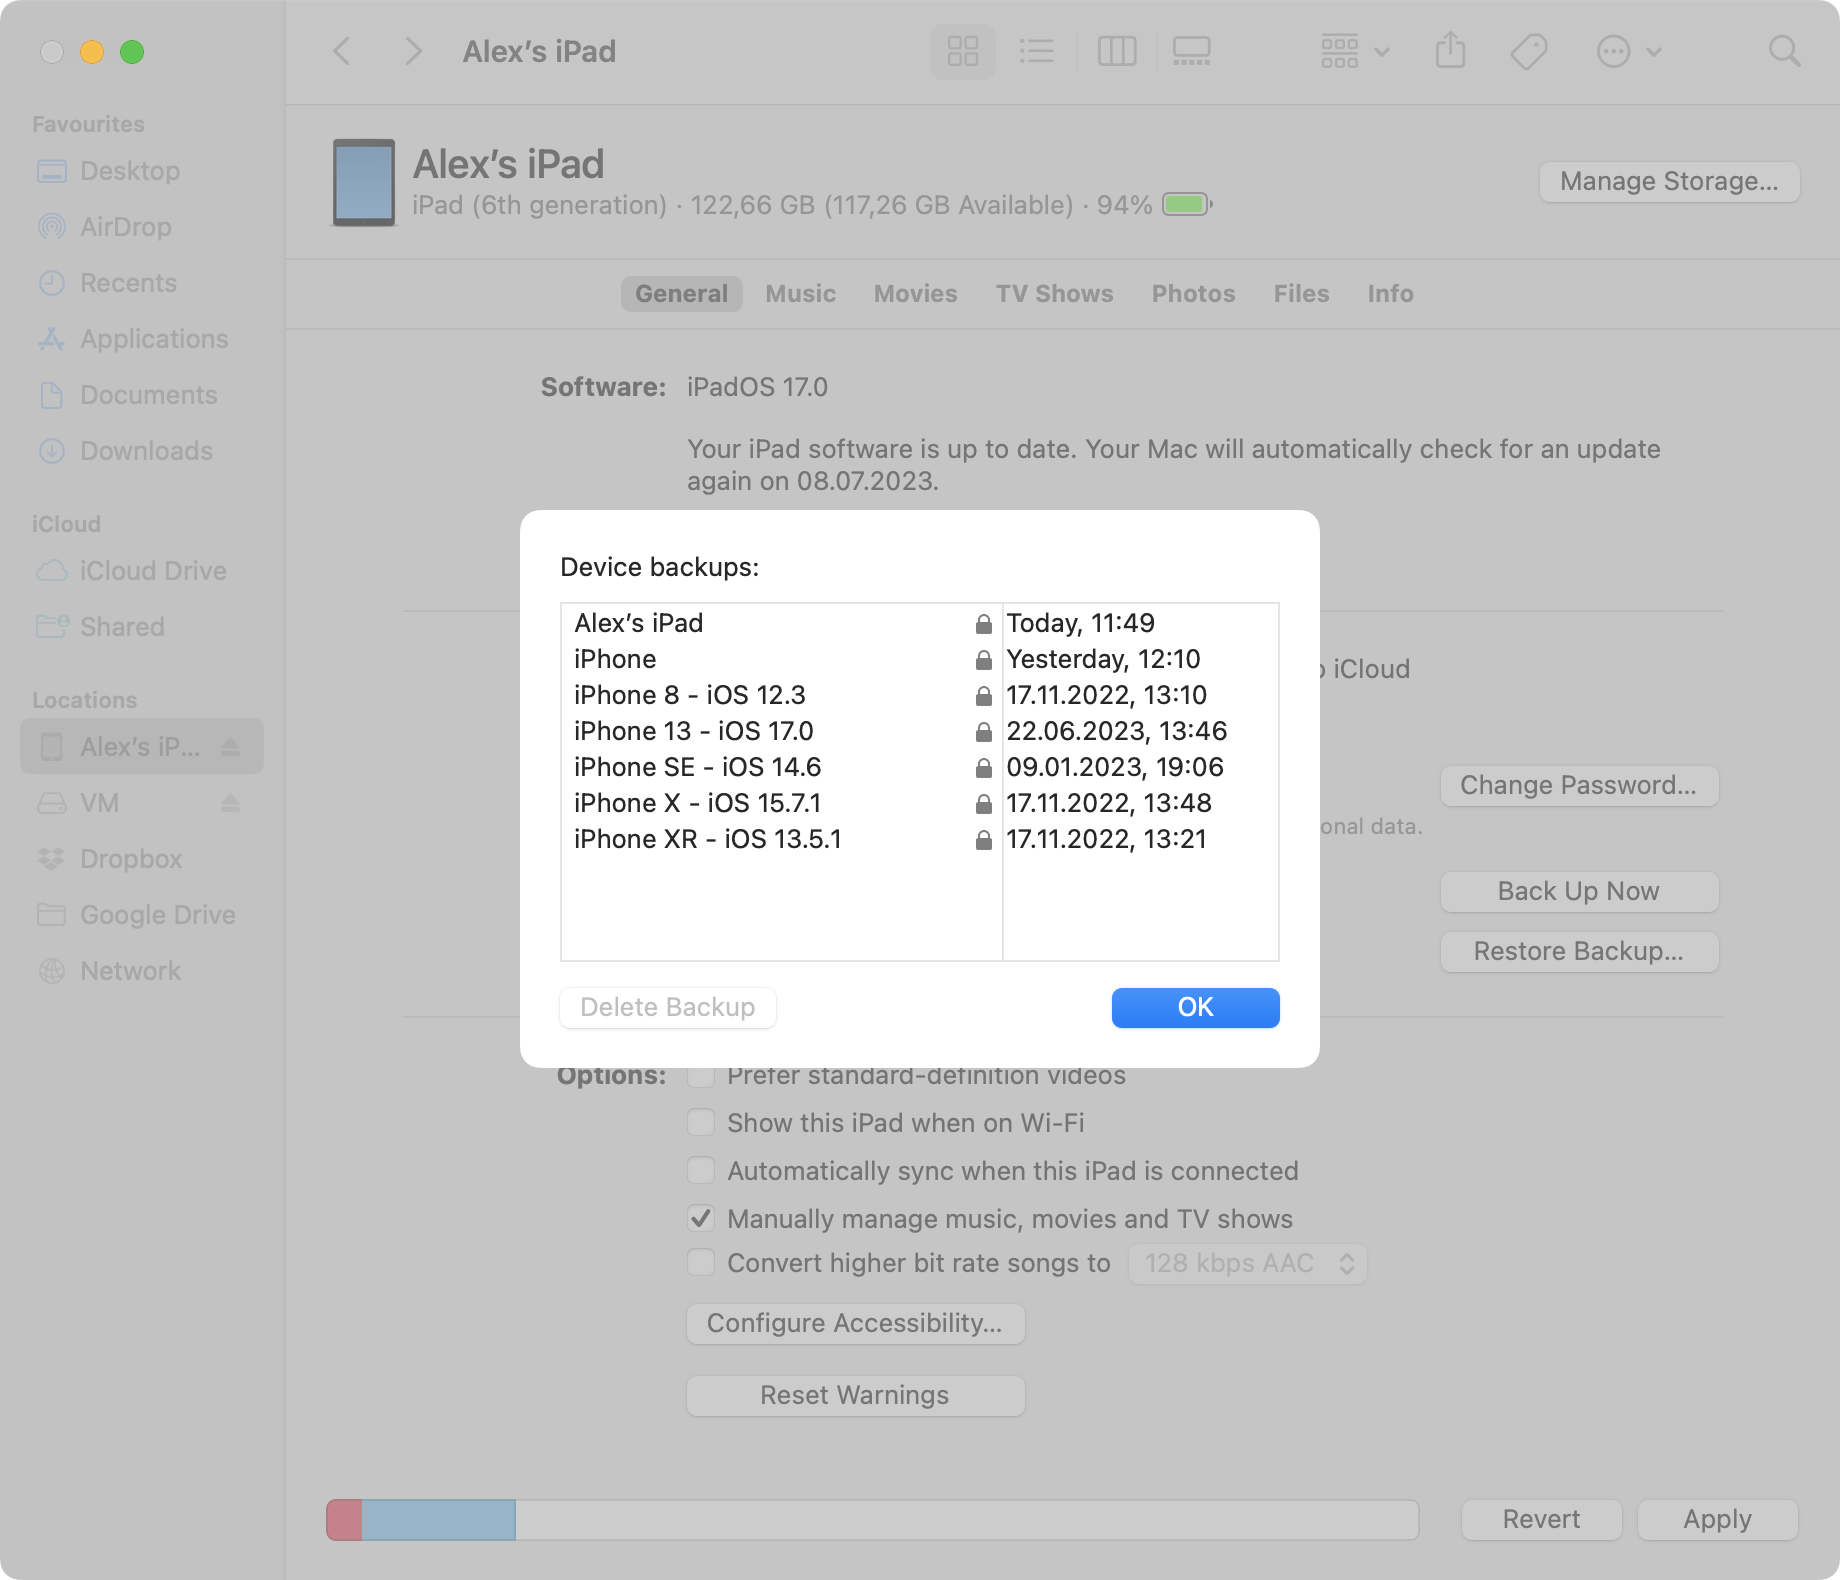
- Under the “Backups” section, click on the “Manage Backups” button.
- A new window will open, displaying all the backups associated with your iPad. From here, you can delete or restore backups as needed.
By following these instructions, you can easily back up your iPad to your Mac using iTunes or Finder, ensuring that your important data is securely stored.
Choosing the Right Backup Method for Your Needs
When it comes to backing up your iPad, it’s important to choose the right method that suits your needs and preferences. Let’s compare different backup methods and explore the advantages and disadvantages of each. In particular, let’s discuss the benefits of backing up directly to the Mac using iTunes or Finder.
1. Backing up to Mac using iTunes
iTunes has long been a popular choice for backing up iOS devices, including iPads, to a Mac. Here are the advantages and disadvantages of this method:
Advantages:
- Convenient: iTunes provides a straightforward way to back up your iPad by connecting it to your Mac via USB.
- Comprehensive Backup: iTunes creates a complete backup of your device, including apps, app data, settings, photos, and more.
- Encryption: iTunes allows you to encrypt your backups, adding an extra layer of security to protect your sensitive data.
- Restore Flexibility: With iTunes backups, you can restore your iPad to a previous state if needed.
Disadvantages:
- Dependence on iTunes: Using iTunes for backups means relying on a specific software that might require updates and maintenance.
- Wired Connection: Connecting your iPad to the Mac using a USB cable may limit mobility and flexibility.
- Compatibility: iTunes is primarily available for macOS and Windows, which might not suit users who prefer other operating systems.
2. Backing up to Mac using Finder
For users running macOS Catalina or later versions, Apple introduced Finder as an alternative to iTunes for backing up iOS devices. Let’s explore the advantages and disadvantages of this method:
Advantages:
- Seamless Integration: Finder integration makes it easy to back up your iPad without the need for additional software.
- User-Friendly: Finder offers a familiar interface and simplifies the backup process for macOS users.
- Local Backups: Like iTunes, Finder allows you to create backups that are stored directly on your Mac.
- Accessibility: Finder is a built-in macOS feature, ensuring compatibility and regular updates.
Disadvantages:
- macOS Compatibility: Finder backups are limited to users running macOS Catalina or later versions.
- Functionality: Some advanced backup features available in iTunes may not be present in Finder.
- Wired Connection: Similar to iTunes, connecting your iPad to the Mac using a USB cable restricts mobility during the backup process.
Ultimately, the choice between backing up to your Mac using iTunes or Finder depends on your specific requirements and preferences. Both methods offer reliable ways to secure your iPad’s data. If you value convenience and comprehensive backups, iTunes might be the right choice. On the other hand, if you prefer a seamless macOS integration and a straightforward backup process, Finder is a suitable alternative.
For more information on backing up your iPad, you can refer to Apple’s support documentation on iPad backups.
Remember, regularly backing up your iPad is crucial to ensure the safety of your data and provide peace of mind, especially in the event of device loss, damage, or software issues.
Troubleshooting Backup Issues
Common Backup Errors and Their Solutions
During the backup process of your iPad to your Mac or MacBook, you may encounter certain errors that can hinder a successful backup. Here are some common issues and their solutions:
Error: “iTunes (or Finder) could not back up the iPad because the backup was corrupt or not compatible.”
This error indicates that the backup file is either damaged or incompatible with the current iOS version. To resolve this issue, follow these steps:
- Delete the existing backup: Open iTunes (or Finder), go to Preferences, select the Devices tab, and locate the faulty backup. Right-click on it and choose Delete.
- Restart your Mac and iPad: Power off both devices, then turn them back on.
- Ensure the latest software versions: Update your Mac, iPad, and iTunes (or Finder) to the latest available versions.
- Attempt a new backup: Connect your iPad to your Mac, initiate a new backup, and check if the issue persists.
Error: “iTunes (or Finder) could not back up the iPad because an error occurred.”
This generic error message can occur due to various reasons. To troubleshoot this error, try the following:
- Check your USB connection: Ensure that the USB cable is securely connected to both your iPad and Mac. Try using a different USB port or cable if available.
- Restart your devices: Power off your iPad and Mac, then turn them back on.
- Update software: Make sure your Mac, iPad, and iTunes (or Finder) are updated to the latest versions.
- Disable security software: Temporarily disable any security software or firewall that might interfere with the backup process.
- Reset settings: On your iPad, go to Settings > General > Reset > Reset All Settings. This will not erase your data but may resolve potential software conflicts.
Ensuring a Successful Backup
To ensure a smooth and error-free backup process when backing up your iPad to your Mac or MacBook, consider the following tips and best practices:
- Regularly update your devices: Keep your iPad, Mac, and iTunes (or Finder) up to date with the latest software versions to benefit from bug fixes and improvements.
- Use a trusted USB cable: Ensure that you are using a high-quality USB cable that is compatible with your iPad and provides a stable connection.
- Free up storage space: Make sure your Mac has sufficient storage space available to accommodate the backup. Clear out any unnecessary files or applications.
- Encrypt your backups: Enable backup encryption in iTunes (or Finder) to add an extra layer of security to your data.
- Disconnect unnecessary peripherals: Remove any unnecessary USB devices or hubs from your Mac to eliminate potential conflicts during the backup process.
By following these troubleshooting steps and implementing best practices, you can overcome common backup errors and ensure a successful and hassle-free backup of your iPad to your Mac or MacBook.
Conclusion
Regularly backing up your iPad to a Mac is essential for preserving your important data and providing peace of mind. Whether you choose to use iTunes or Finder, both methods offer reliable options for creating comprehensive backups of your iPad’s settings, app data, and documents. iTunes provides a convenient and feature-rich backup experience, while Finder offers seamless integration for macOS users. However, it’s important to consider factors like software compatibility, wired connection limitations, and personal preferences when deciding between the two options.
Remember to regularly update your devices, use trusted USB cables, and free up storage space on your Mac to ensure a smooth backup process. By following the provided instructions and troubleshooting tips, you can overcome common backup errors and ensure a successful backup. Prioritizing the safety of your data through regular backups will help you protect your valuable information and provide a safety net in the event of device loss, damage, or software issues.
FAQ
If you don’t wanna mess with iCloud for backing up your iPad, just hook up your iPad to your Mac using a USB cable. Open Finder on your Mac, find your iPad in the sidebar, and hit the “Back Up Now” button to start the backup.
Absolutely! You can totally back up your iPad to an external hard drive. Plug in that external hard drive into your Mac, fire up Finder, locate your iPad in the sidebar, and while holding the Option key, click on “Back Up Now.” A window will pop up, and there you can choose the external hard drive as the backup destination.
There could be a bunch of reasons why you’re having trouble backing up your iPad to your Mac. Make sure you’ve got the latest macOS and iTunes versions installed on your Mac. Double-check that your iPad is unlocked and properly connected to your Mac using a USB cable. And hey, don’t forget to see if you’ve got enough free space on your Mac to handle the backup.
When it comes to backing up your iPad, you’ve got two main options. Option one: iCloud. Just make sure your iPad is connected to a Wi-Fi network, head over to “Settings,” tap your Apple ID up top, choose “iCloud,” then “iCloud Backup,” and finally tap “Back Up Now.” Option two: connect your iPad to your Mac using a USB cable, launch Finder, find your iPad in the sidebar, and hit that “Back Up Now” button.