Backing up your devices is something every user should make a habit. If you’re an Apple user, it’s easier to back up data from one device to another. This article will explore how to back up iPhone to Mac computer or MacBook, including the different methods to back up your files. Additionally, we will discuss an alternative backup method, such as iCloud, and how to restore data from a backup selectively. Let’s dig in.
How to Back Up Your iPhone on Your Mac Computer
When it comes to backing up your iPhone on a Mac computer, there are two primary methods that you can choose from: Finder and iTunes. Both methods have their advantages, and the choice ultimately depends on your preference and your macOS version. Here are the steps on how to back up your Mac.
Step 1: ? Preparing for Backup
Before you begin the backup process, it’s essential to ensure that your macOS and iTunes are up to date. Keeping your software updated ensures compatibility and smooth functioning. Once you have updated your macOS and iTunes, follow these steps:
- Connect your iPhone to your Mac computer using a USB cable. Ensure that the cable is in good condition to establish a stable connection.
- When you connect your iPhone to your Mac for the first time, you might need to trust the computer on your iPhone. Unlock your iPhone and, if prompted, tap Trust to establish a secure connection.
Step 2: ? Choosing and Applying the Backup Method
Option A: Back Up iPhone to Mac Using Finder (macOS Catalina and later)
- Launch Finder on your Mac with macOS Catalina or later. You can do this by clicking the Finder icon in the Dock or selecting Finder from the Applications folder.
- Connect your iPhone with your Mac or MacBook using a USB cable.
- You will be asked for your iPhone’s passcode or to trust this computer. Follow the on-screen process.
- In the sidebar of the Finder window, you will see your connected iPhone under the Locations section. Click on your iPhone to select it.
- In the main window, you will see various tabs related to your iPhone. Select the General tab.
- Under the Backups section, click on the Back Up Now button. You can also choose to encrypt the backup for enhanced security by selecting the Encrypt local backup checkbox.
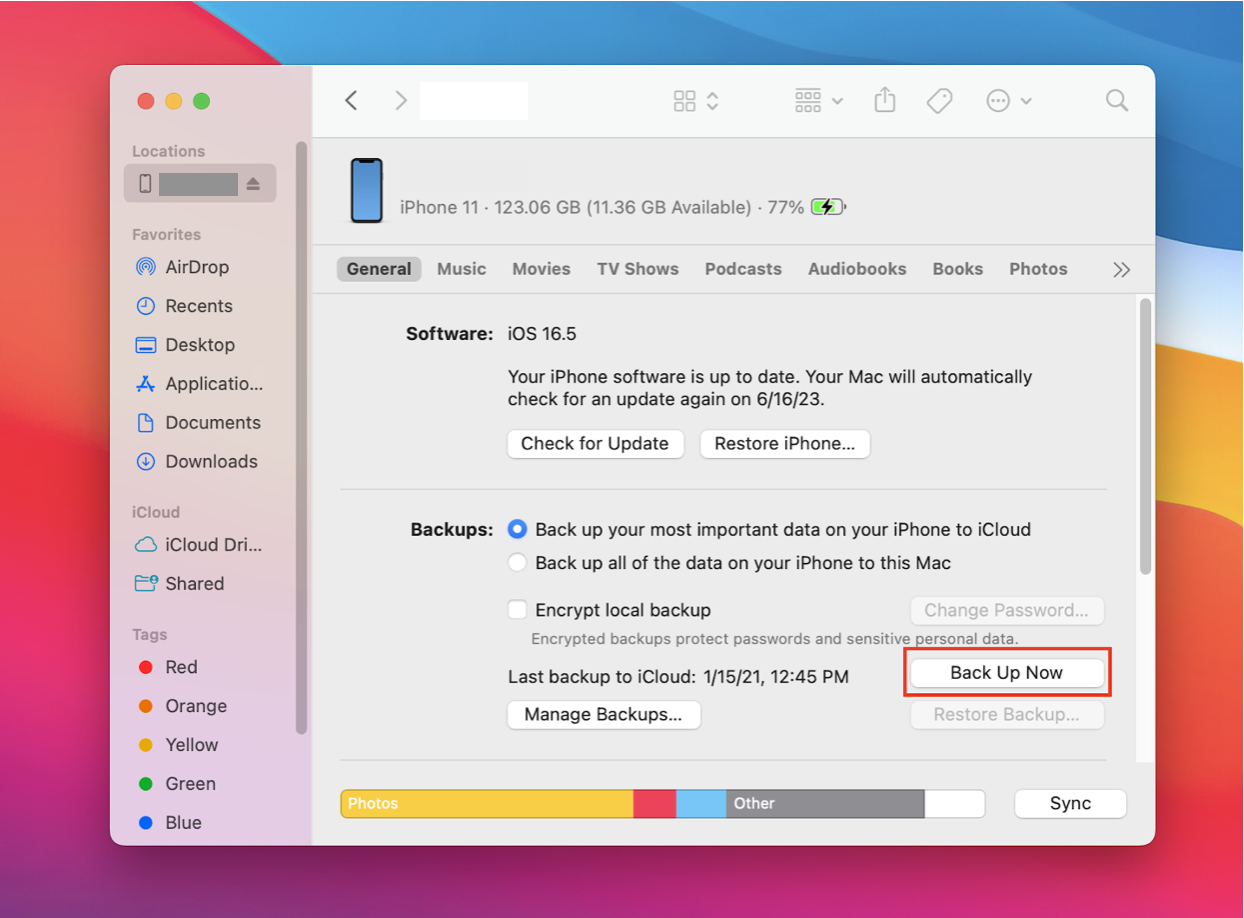
- Wait for the backup process to complete. You can monitor the progress in the Finder window.
- You can verify that your backup process is done if you’ll see the date and time of your latest backup.
Option B: Back Up iPhone to Mac Using iTunes
For macOS Mojave and earlier:
- Launch iTunes on your Mac.
- Connect your iPhone to your Mac via a lighting cable.
- Click the phone icon on the left corner of iTunes homepage.
- Then, click Back Up Now.
- Once done, you can now select the eject button and unplug your phone.
For macOS Catalina and later:
- Launch Music app.
- Connect your iPhone to your Mac using a USB cable.
- Select your iPhone under the list of Devices on the left tab, then select Sync Settings.
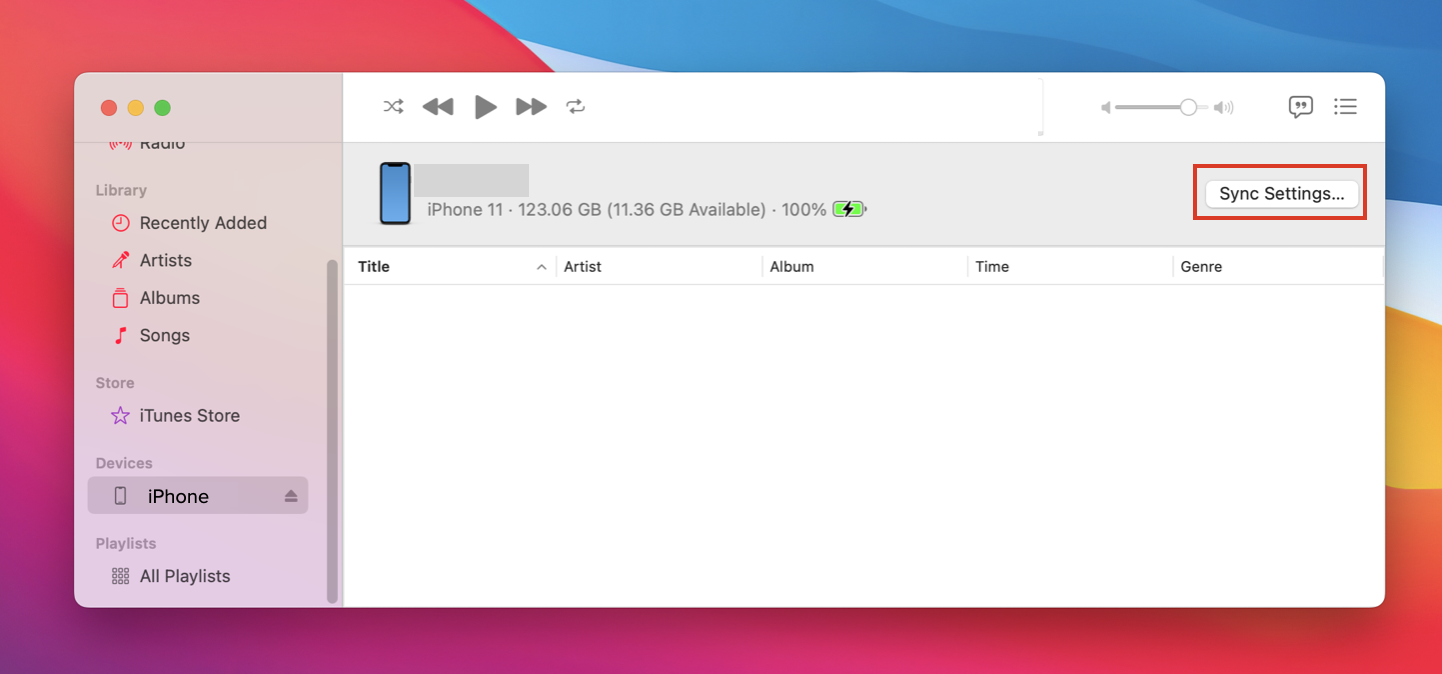
- Then, you will be redirected to Finder. To ensure your backup is secured, encrypt your iPhone backup by selecting the Encrypt Local Backup, then click the Back up Now button.
- Create a new password to encrypt your iPhone backup, then hit Save Password. Keep this password somewhere safe, as you cannot restore this backup without a password.
- iTunes should start backing up your iPhone now. Wait until it is complete.
- You can verify that your backup process is done if you’ll see the date and time of your latest backup.
- If you want to see your backup, just go to the menu tab, select Edit, then click Preferences.
- Under Devices section, you should see your iPhone backed up along with the date and time of its latest backup.
Backing up with iCloud as an Alternative
In addition to the backup methods mentioned above, you can also use iCloud to back up iPhone to MacBook as an alternative backup method. iCloud provides several benefits, including wireless backups and the ability to access your backups from multiple devices. You can store up to 5GB free of storage on iCloud.
Here’s how you can set up and initiate an iCloud backup on your iPhone:
- On your iPhone, go to the Settings app.
- Tap on your Apple ID banner at the top of the screen.
- In the Apple ID menu, select iCloud. Enable those apps that you want to be backed up.
- Toggle on the iCloud Backup option if it is not yet enabled.
- To start an immediate backup, tap on Back Up Now. Ensure you have a stable internet connection, as the backup process relies on iCloud servers.
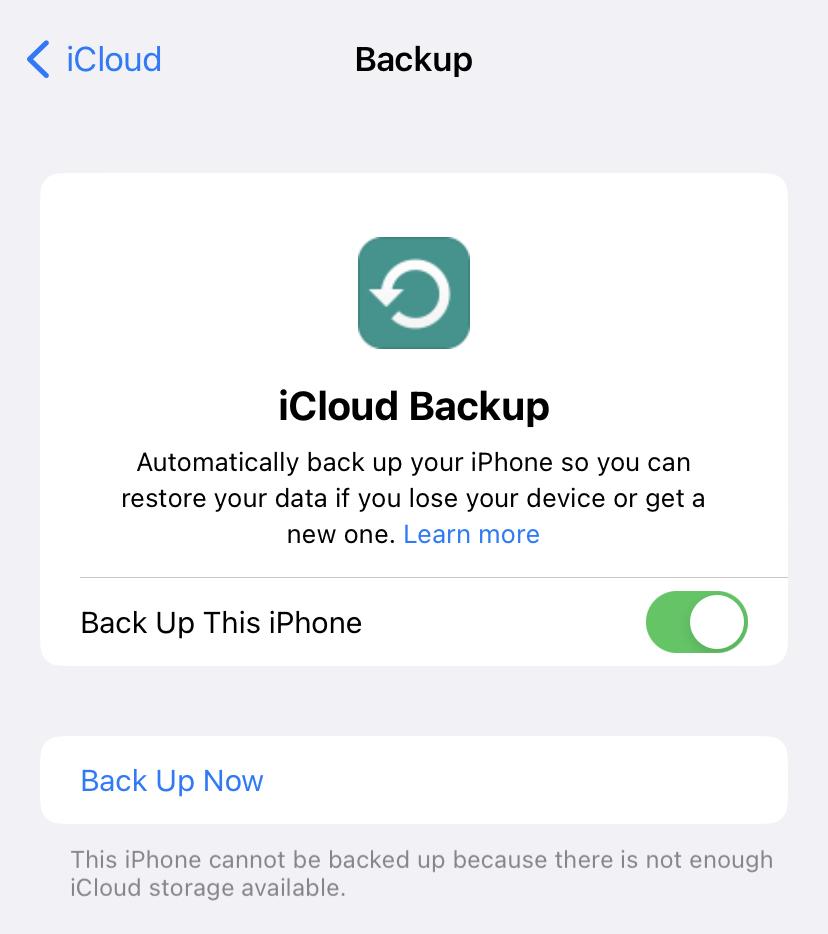
- Monitor the progress of the backup on your iPhone. You can also check the backup status in the iCloud Backup section of the Settings app.
It is important to know that iCloud backups might require sufficient iCloud storage space. If you run out of storage, you can manage your storage settings or upgrade to a higher storage plan.
How to Selectively Restore Data from an iPhone Backup on Mac
Sometimes, you may need to restore only specific data from an iPhone backup instead of restoring the entire backup. Disk Drill for Mac is a reliable software for accomplishing this task. Disk Drill provides an easy-to-use interface and powerful data recovery capabilities. Here’s how you can use Disk Drill to restore data from an iPhone backup on your Mac selectively:
- Download and install Disk Drill for Mac from the official website.
- Launch Disk Drill on your Mac.
- Connect your iPhone to your Mac using a USB cable.
- Select your iPhone from the list of available drives. Select the iOS backup from the list, then click Search for lost data.
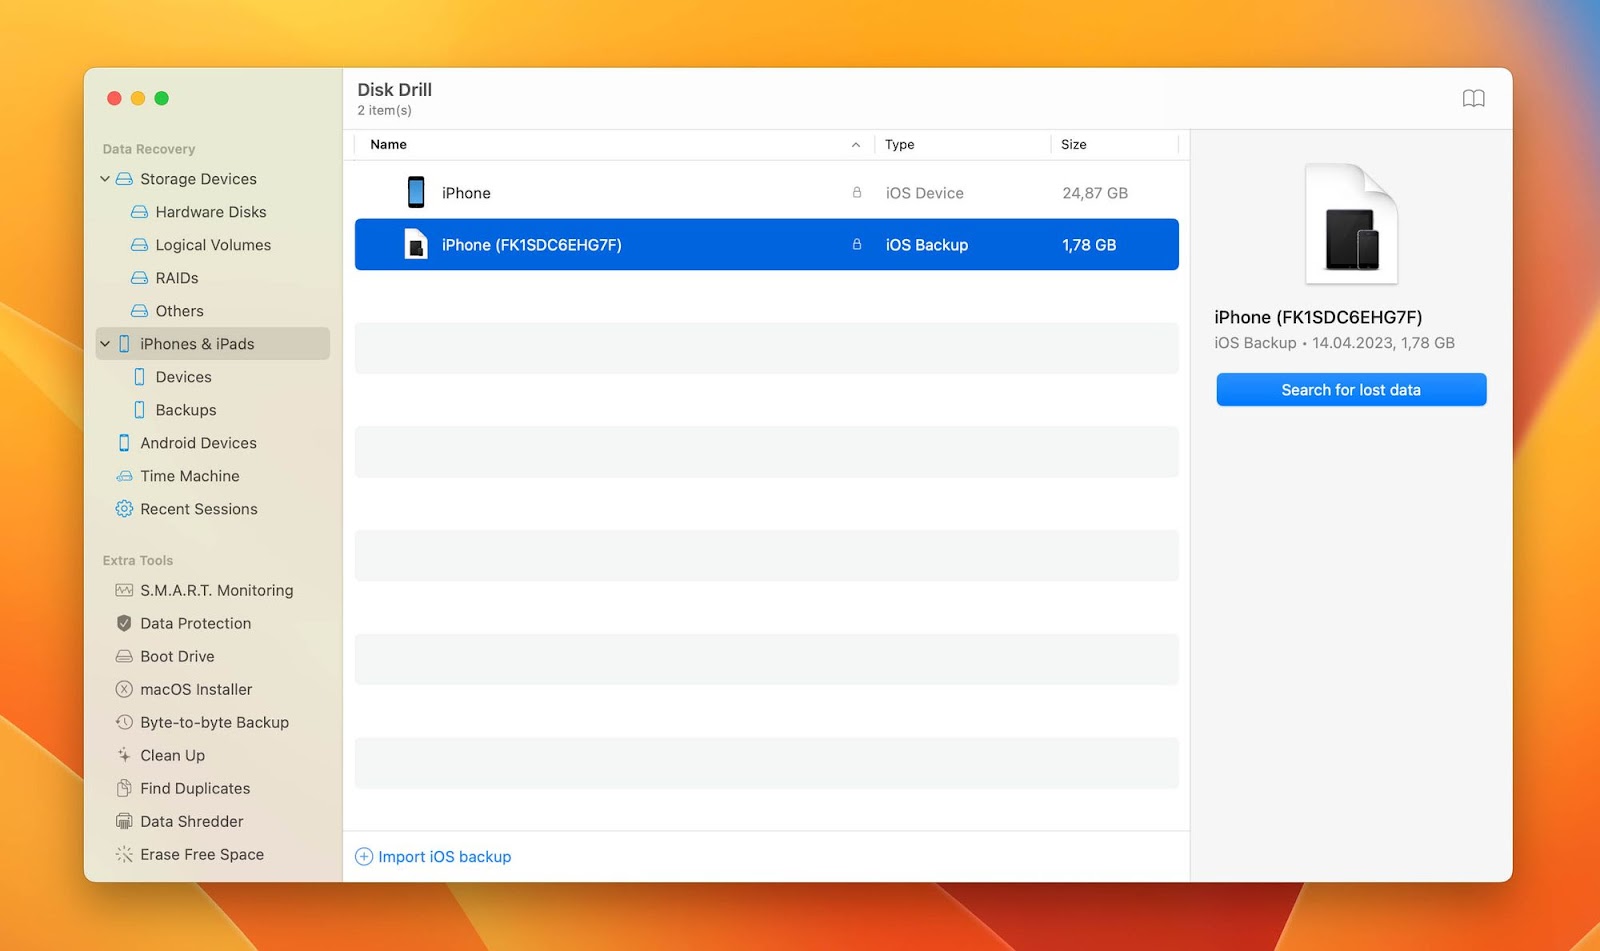
- Disk Drill will start scanning your iPhone backup and displaying a recoverable file list.
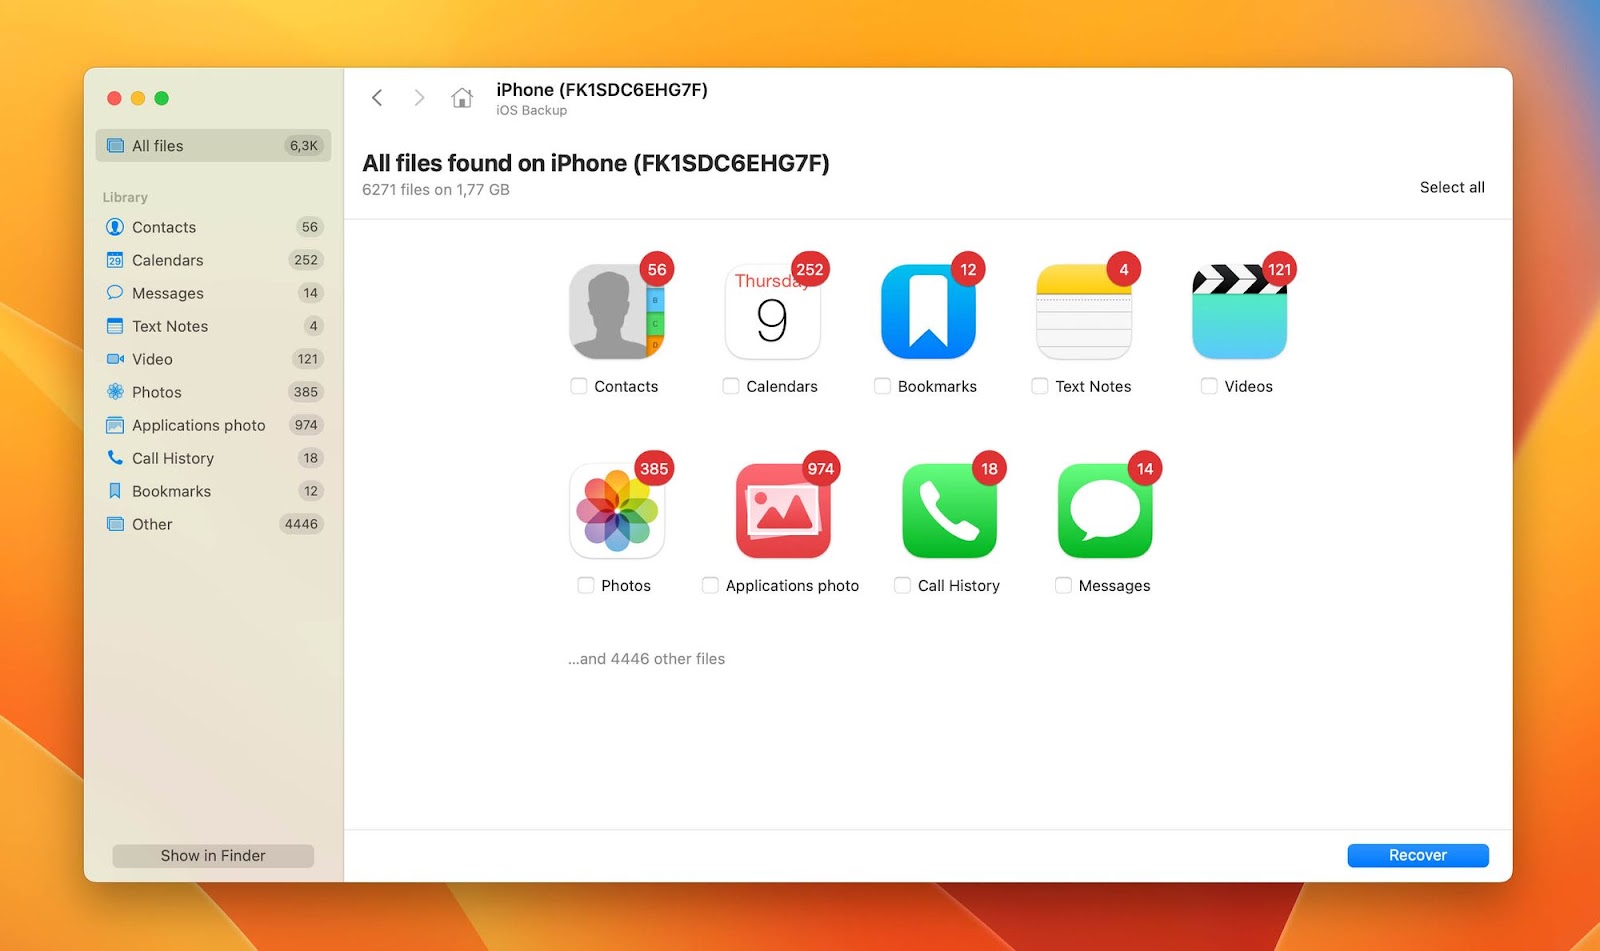
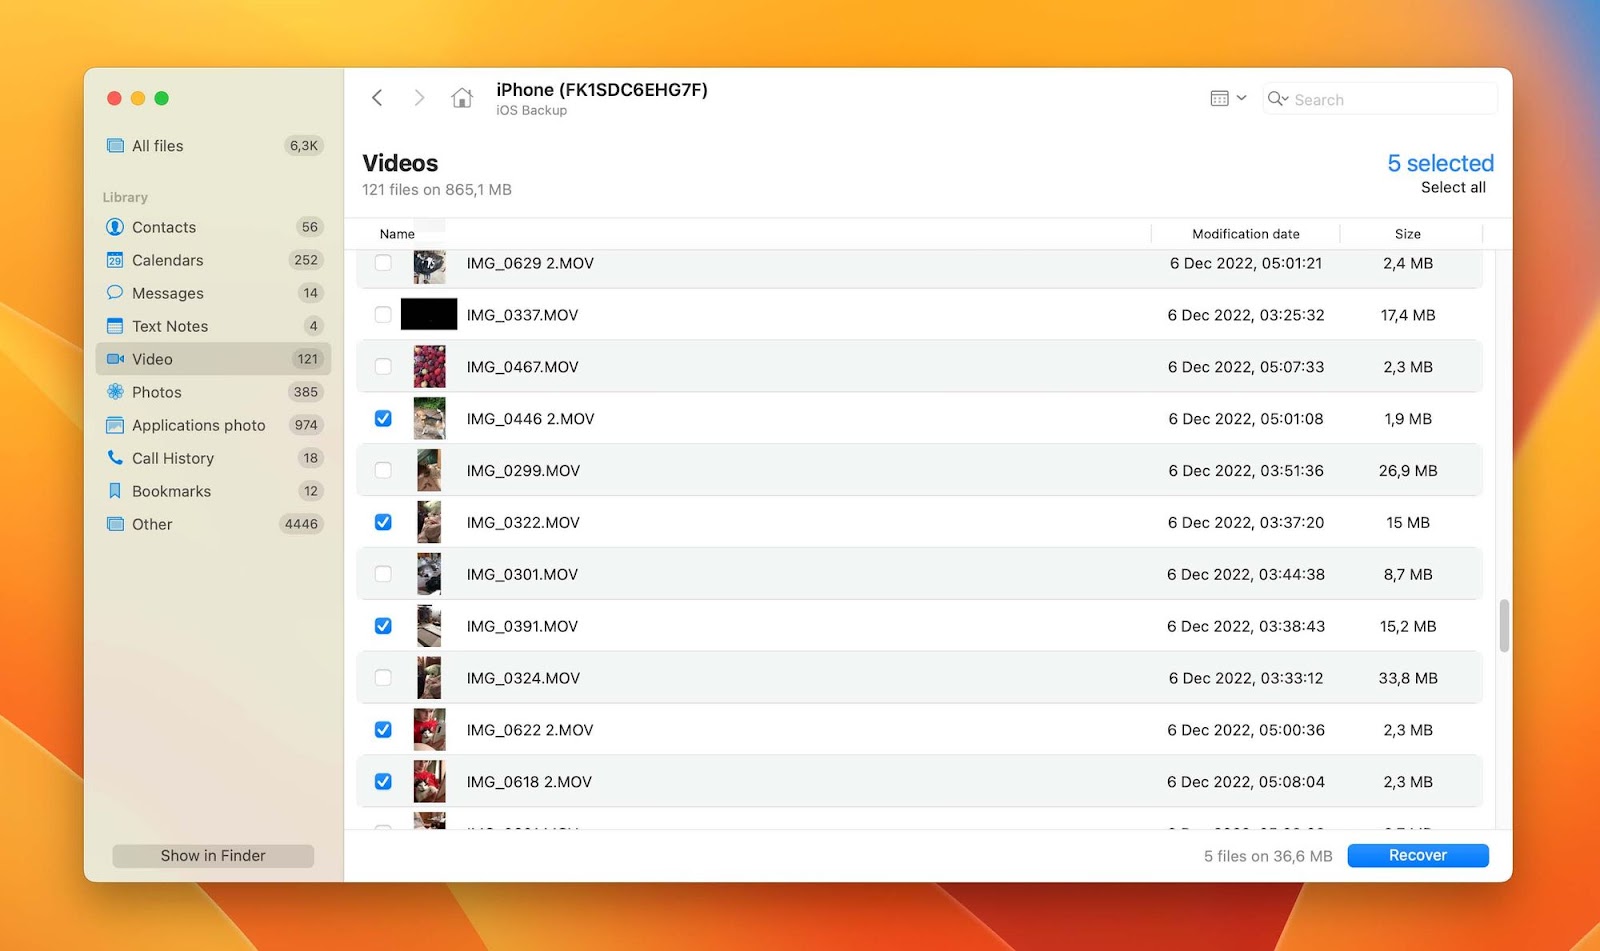
- Browse through the recoverable files and select the specific data you want to restore.
- Click on the Recover button to initiate the data restoration process.
- Choose a location on your Mac where you want to save the recovered files.
- Once the process is complete, you can access the restored data on your Mac.

FAQs
To back up iPhone to Mac computer using a USB cable, you can use Finder or iTunes. Here’s how you can back up iPhone to MacBook:
- Launch Finder on your Mac with macOS Catalina or later.
- Connect your iPhone to your Mac using a USB cable.
- Follow the on-screen instructions to enter your iPhone’s passcode and trust the computer.
- In the Finder window sidebar, select your connected iPhone under Locations.
- In the main window, choose the General tab.
- Click the Back Up Now button under the Backups section. You can encrypt the backup by selecting the Encrypt local backup checkbox.
- Wait for the backup process to finish. Monitor the progress in the Finder window.
- To confirm the completion of the backup, check the date and time of your latest backup.
Before getting a new one, you can back up your iPhone to iTunes first. Here’s how:
- Launch iTunes on your Mac.
- Connect your iPhone to your Mac using a USB cable.
- In the iTunes app on your Mac, click the device button near the top left of the iTunes window.
- Click Summary.
- Click the Back Up Now button option located below the Backups section. To ensure that your backups are secured, choose the option Encrypt [device] backup, enter a password, and click on Set Password.
- To view the backups saved on your computer, go to the Edit menu, select Preferences, and click on Devices. A lock icon in the backup list can identify encrypted backups.
Note: For macOS Catalina and later, iTunes app has been replaced by Music.
Yes, backing up your iPhone to a Mac is highly recommended. It provides a local backup that is accessible even without an internet connection, and you have full control over your data.
You can back up your iPhone without cable using iCloud. Here’s an easy process on how to do it:
- Open the Settings app on your iPhone.
- Tap your Apple ID banner at the top.
- Select iCloud and ensure photos and desired data are enabled for iCloud syncing.
- Tap iCloud Backup and toggle it on if not already enabled.
- Tap Back Up Now for an immediate backup. Ensure a stable internet connection.
If you don’t want to use iCloud for backup, you can use Finder or iTunes on your Mac to create local backups.
If you are unable to back up your iPhone to your Mac, there could be several reasons. Ensure that your Mac and iPhone are updated to the latest software versions, check your USB cable for any damage, and ensure that you have enough storage space on your Mac.
If you have used Finder to back up your iPhone, the backup files are stored in the designated backup location you selected. If you have used iTunes, the backup files will be in a specific folder on your Mac. Click the magnifier glass on the menu bar and copy and paste this: ~/Library/Application Support/MobileSync/Backup/ and then select the Backup folders under Folders.
To back up your iPhone to an external hard drive on Mac, you can use the same methods mentioned earlier in this article (Finder). However, during the backup process, select the external hard drive as the backup location instead of the internal Mac storage.
The time it takes to back up an iPhone to a Mac depends on several factors, including the amount of data on your iPhone, the speed of your Mac, and the connection speed between your iPhone and Mac. Generally, the backup process can take a few minutes to an hour or more.
Yes, if you have macOS Catalina or a newer version, you can back up your iPhone to your Mac over WiFi using Finder. Ensure that both your iPhone and Mac are connected to the same Wi-Fi network, and follow the steps mentioned earlier in this article to initiate the backup process.
Conclusion
Backing up your iPhone to a Mac or MacBook is crucial to safeguard your valuable data. Whether you use Finder or iTunes, both methods offer a reliable way to create local backups. Additionally, iCloud provides an alternative backup option, allowing you to wirelessly back up your iPhone and access your backups from multiple devices. Disk Drill for Mac offers a convenient solution if you need to selectively restore data from an iPhone backup.
Remember to keep your software up to date, establish a stable connection between your iPhone and Mac, and regularly create backups to ensure the safety and security of your iPhone data.