Experiencing data loss on a USB flash drive isn’t a fun ride at all. Many things can lead to such an undesired outcome: file system corruption, accidental formatting, or even basic human error. But luckily, whatever the reason is, there is a way to bring back the missing data from your USB flash drive using a Mac.
TL:DR; In this article, we’ll show you how to recover deleted files from a USB on a Mac and provide you with step-by-step instructions for each option.
Preliminary Steps Before Data Recovery
So, the first thing that you should know is that if you need to restore a lost or deleted file from a USB flash drive on a Mac, data recovery is possible. However, the results will depend on a few factors.
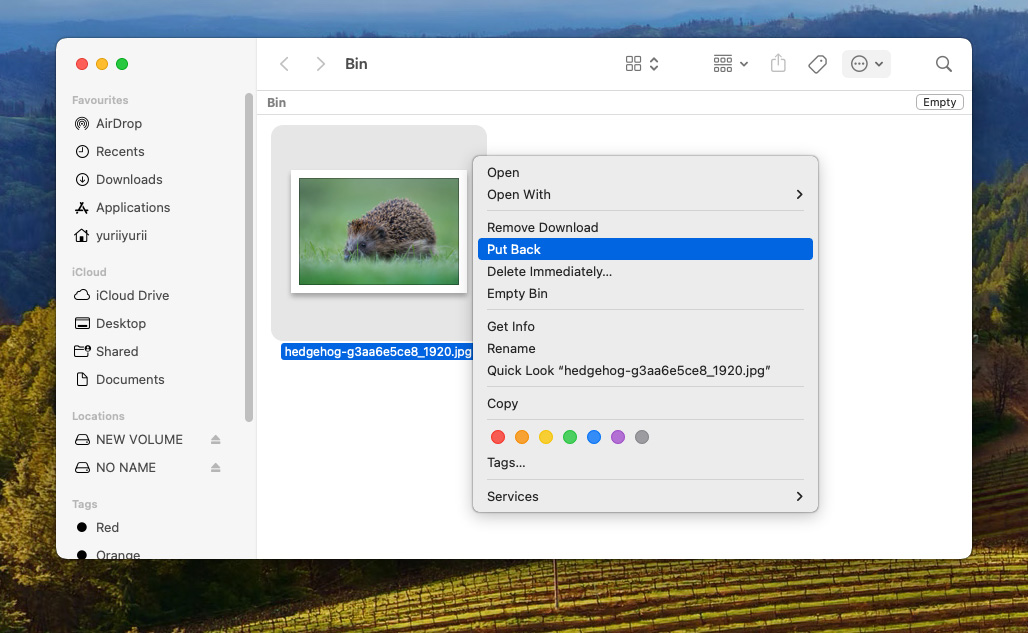
But before you actually make an attempt at restoring the data using the methods in this article, it’s best to check the Trash folder since it’s possible that the file is still there, and you won’t need to perform the recovery after all. To do that, simply connect your USB drive to your Mac and click the trash bin icon on the Dock to open the Trash folder. If the needed file is there, all you need to do to restore it is drag and drop it to a different folder.
Also, if you’ve been regularly backing up your flash drive and are sure that the deleted data is on there, you can recover those files from it.
Key Causes of Data Loss on USB Drives and Immediate Response
If neither of the above-mentioned situations applies to your own, then your further steps will depend on how exactly the data was lost. Check out the table below for more information.
| Data Loss Reason | Description |
| Human error | This is the most common reason for data loss on any device. You can easily delete a wrong file on your flash drive with just one click of the mouse. Or quite often people delete a file and only after some time has passed realize that they actually need that file. If that’s the case and even if the file is already erased from the Trash folder, the deleted data can still be recovered. |
| Accidental formatting | If you’ve formatted your USB flash drive, then all of the data that was stored there got erased once that happened. In this case, the only way to bring those files back is by using specialized data recovery software. But of course, your chances will be higher if you used the Fastest data erasure setting when formatting the flash drive since it isn’t as secure as the other ones. |
| Drive corruption | Software bugs, power issues, or bad sectors can be the cause of USB flash drive corruption. If you’ve noticed that your flash drive isn’t saving files correctly or data started to disappear for no apparent reason, then it might be corrupted. In such a situation, it’s best to try to repair the drive first and if it hasn’t helped, try to restore the lost data using a data recovery tool. |
| Physical damage | A USB flash drive can get damaged in many ways: from water, excess heat, dust, etc. If that’s your case and now the drive fails to mount to your Mac, then it’s best to resort to a data recovery service and let professionals try to recover the data from it. |
| Interruption of the read-and-write process | It’s impossible to stress enough the importance of properly ejecting a USB flash drive from your Mac. If you unplug it from your computer while transferring files, it can lead to data loss. In this case, your best option is to use a data recovery tool to retrieve the lost files. |
| Virus or Malware Attacks | Malicious software can infiltrate your USB drive when connected to infected devices. These viruses or malware can delete, corrupt, or encrypt your files, making them inaccessible. It’s crucial to use antivirus software and be cautious about connecting your USB drive to unknown or public computers to avoid such risks. |
If you suspect data loss on your USB drive, immediately cease using it. Continuing to add or modify files can overwrite the lost data, significantly reducing the chances of successful recovery. Ensure the USB drive is safely disconnected and not used until you’re ready to begin the recovery process.
How to Recover Deleted Files From USB on a Mac
Basically, the only effective way to retrieve permanently deleted files from a USB flash drive on a Mac is with the help of specialized data recovery software. So to make sure that you get the best results, in this article, we will go over a few data recovery tools that should assist you in recovering the deleted files from your flash drive.
Option 1. Disk Drill for Mac
The first data recovery software that we’ll cover is called Disk Drill. This professional tool is designed to make data recovery accessible to all users, regardless of their tech knowledge level. It’s easy to navigate, quick, and compatible with most major file systems and file formats. Moreover, it supports all USB drive types and brands, as well as a large number of various file types, including the ones that are most commonly used with USB flash drives (such as images, documents, videos, presentations, etc.).
Follow these steps to recover a USB drive on a Mac using Disk Drill:
- Download Disk Drill and follow the onscreen instructions to install the tool.
- Connect the USB flash drive to your Mac.
- Launch Disk Drill and choose the connected drive from the list of available devices.
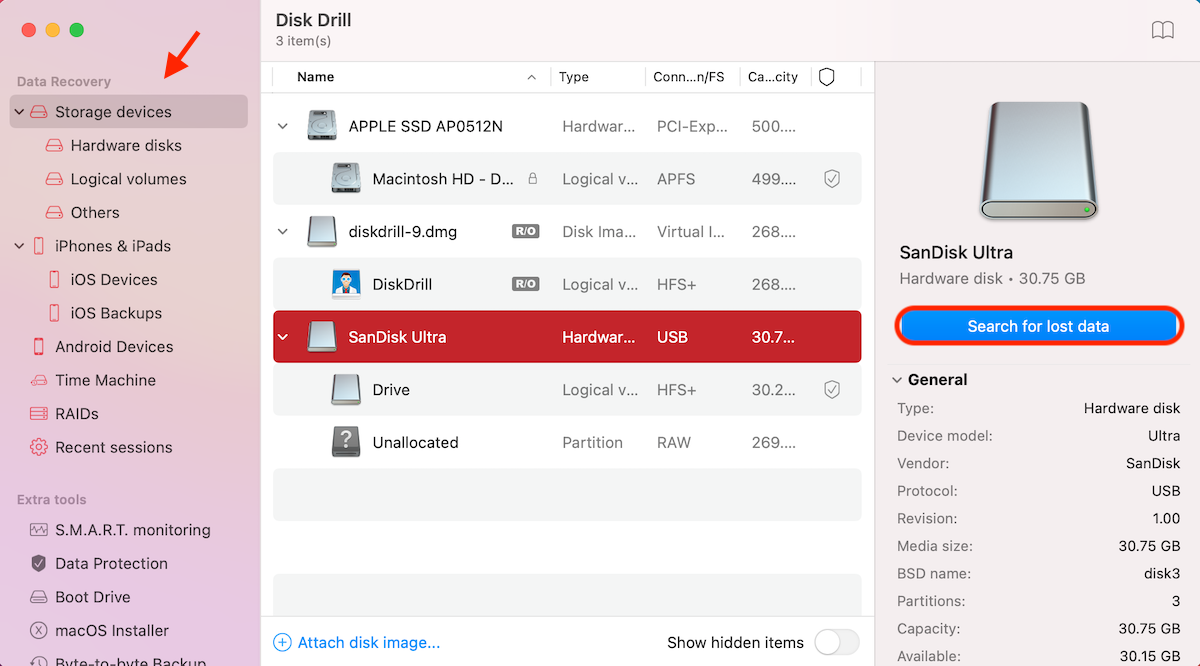
- Click the Search for lost data button to initiate the scan.
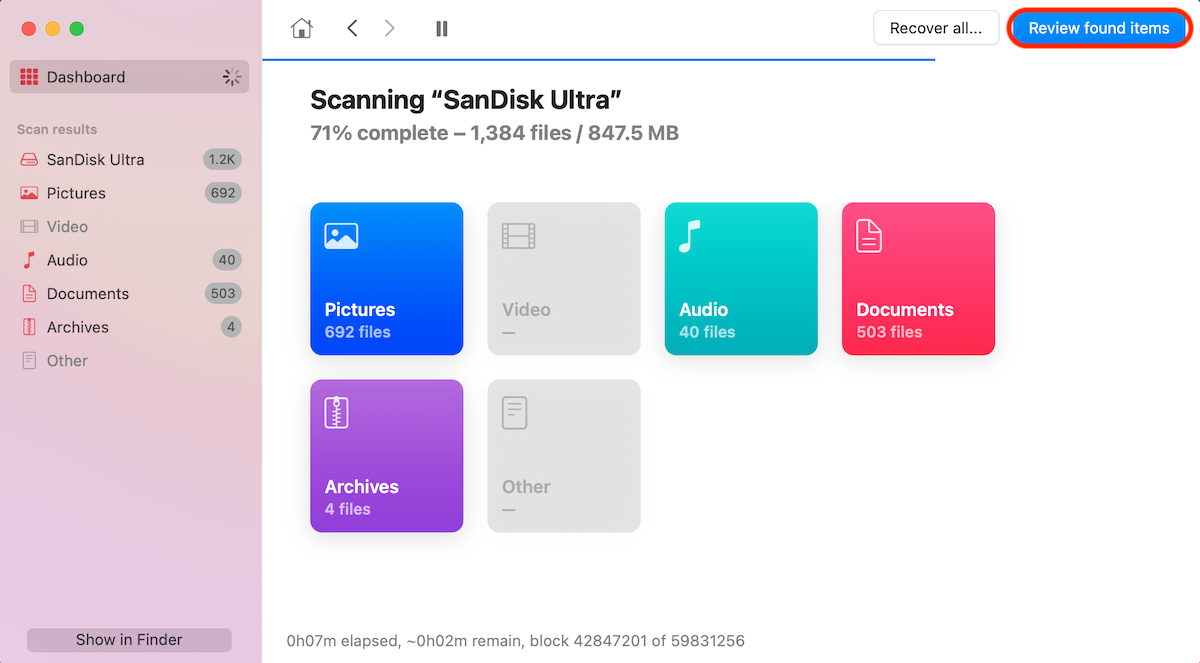
- Wait for the scan to finish and click Review found items to see the potentially recoverable files.
- Use the search field at the top right to find a specific file or file type (you can type in a file name, the needed file type, or file extension). Or use the sidebar on the left to narrow down the scan results.
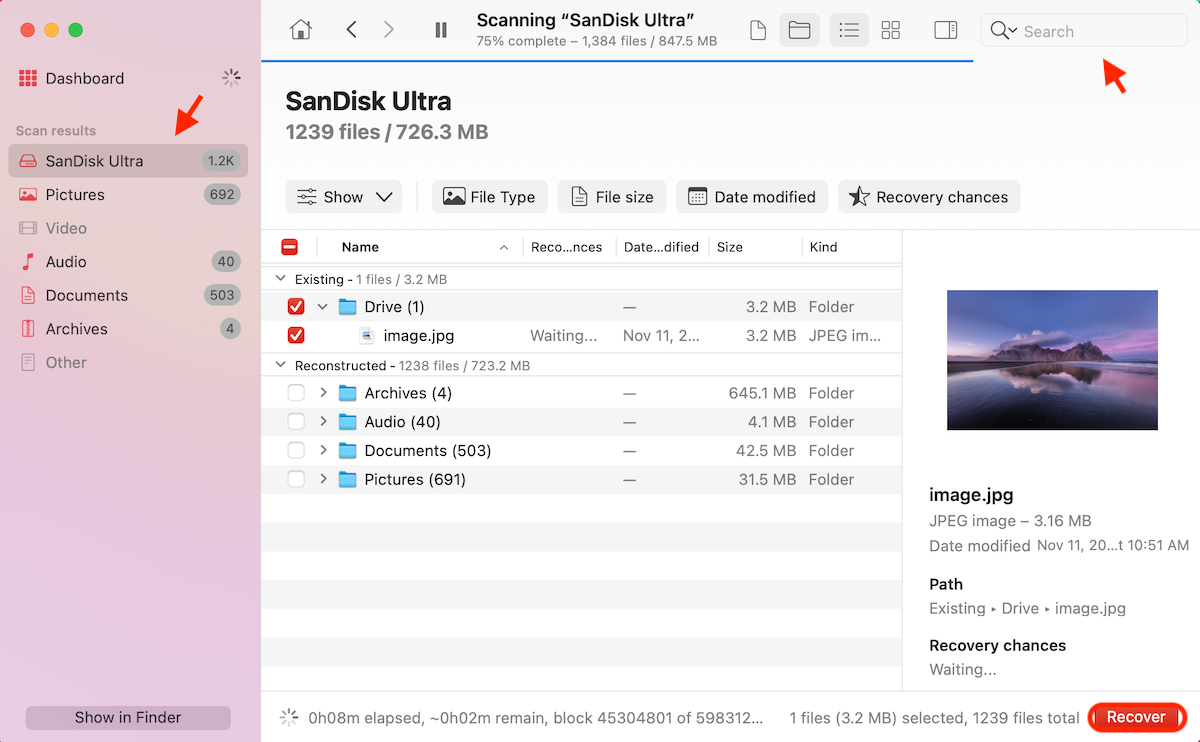
- Click the eye icon near a file to preview it.
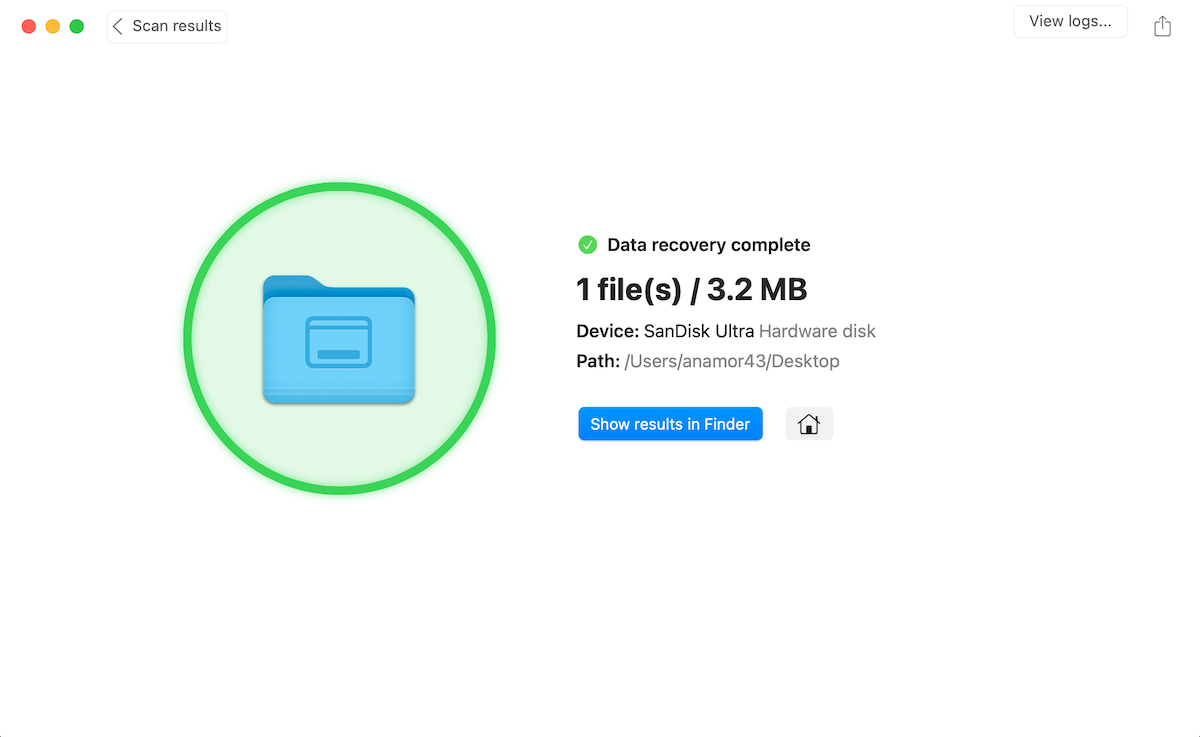
- Choose the files you wish to restore and click the Recover button.
- Select a folder that you want to use as the location for the recovered data and click Next.
Note: Keep in mind that the free Disk Drill version allows you to scan the USB drive and preview the potentially recoverable files. To actually recover the chosen data, you’ll need to get the paid pro Disk Drill version.
Option 2. R-Studio for Mac
Another data recovery tool worth mentioning in this situation is R-Studio. This efficient tool supports files of various sizes and formats. And what’s most important, it is capable of recovering deleted data from any USB flash drive. However, it’s a bit more complicated to use and, therefore, better suitable for advanced Mac users.
Follow these steps to recover files from a USB on your Mac using R-Studio:
- Download R-Studio and install it on your Mac.
- Connect your USB drive to your computer and launch the application.
- Select your drive from the list of available devices on the left.
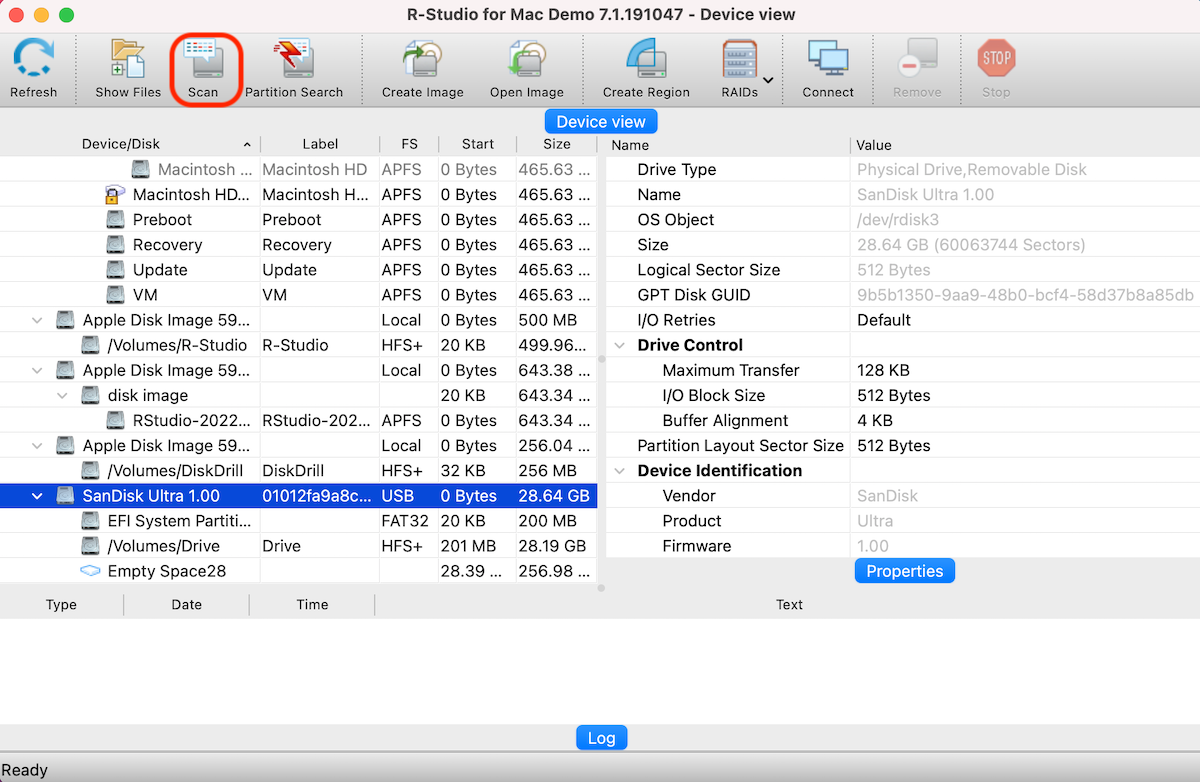
- Click the Scan button at the top of the screen.
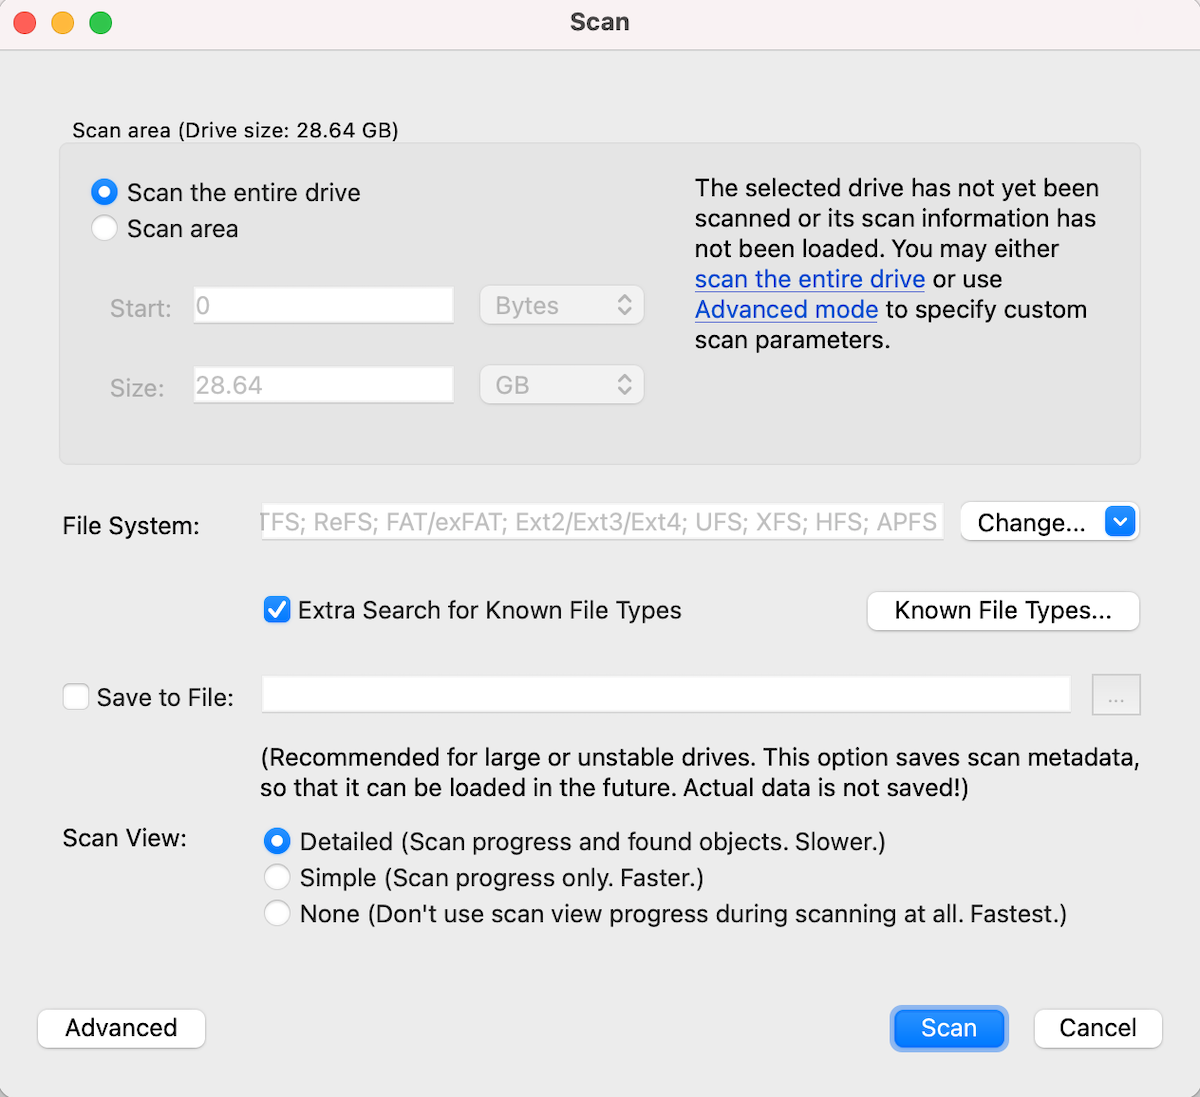
- Choose the option to Scan the entire drive and click Scan to confirm.
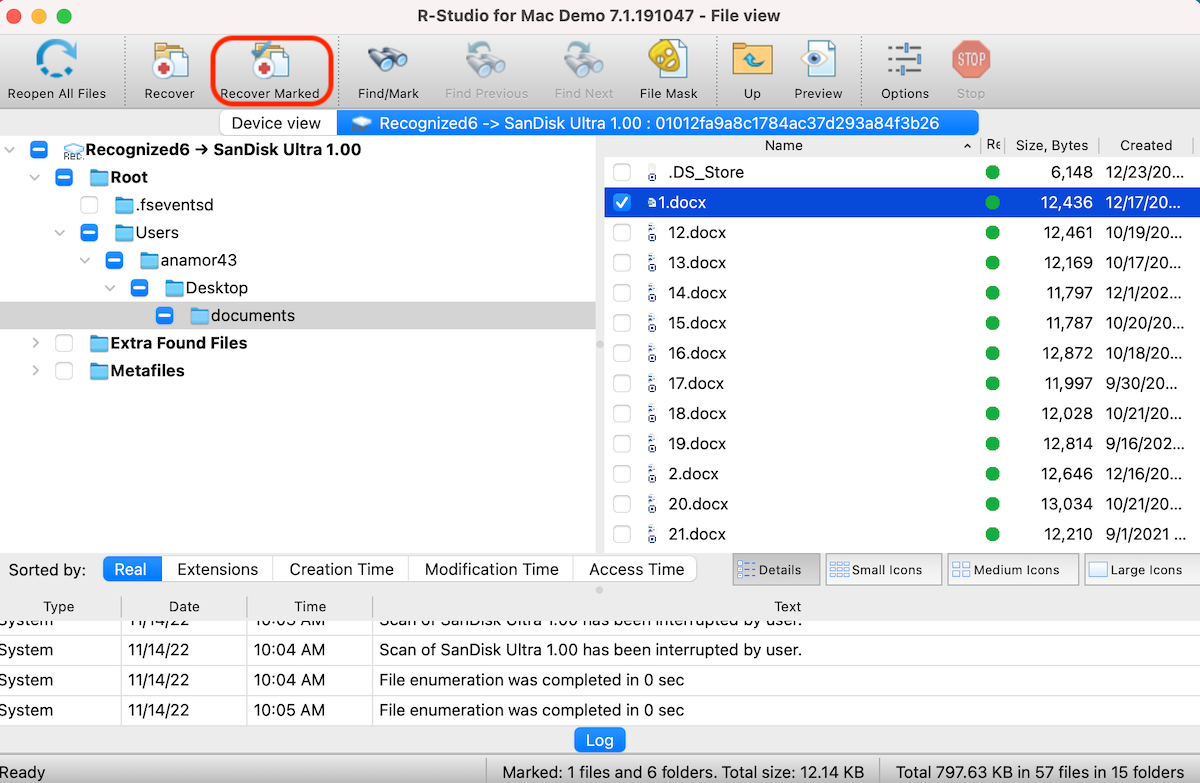
- Preview the discovered files and click the box near a file to select it.
- Once you’re ready, click the Recover Marked button at the top.
- Choose a recovery destination and click the OK button.
Note: The R-Studio trial version allows you to scan your USB drive, preview potentially recoverable files, and recover files that are smaller than 256KB. If you want more, then you should get one of the R-Studio paid plans.
Option 3. PhotoRec
If you’re looking for entirely free data recovery software that would help you to recover USB drive data on a Mac, then you should try PhotoRec. This is an open-source application that can restore various image, video, and document file formats and does a pretty good job scanning flash drives for lost data.
But just like any other data recovery tool, this one has a few drawbacks, the biggest one probably being the fact that it comes out only in a command-line user interface, which makes it a bit hard to navigate for some users.
Follow these steps to perform USB data recovery on a Mac using PhotoRec:
- Download PhotoRec on your computer (it comes together with another tool called TestDisk, so you’ll have to download both of them).
- Connect the USB flash drive to your Mac.
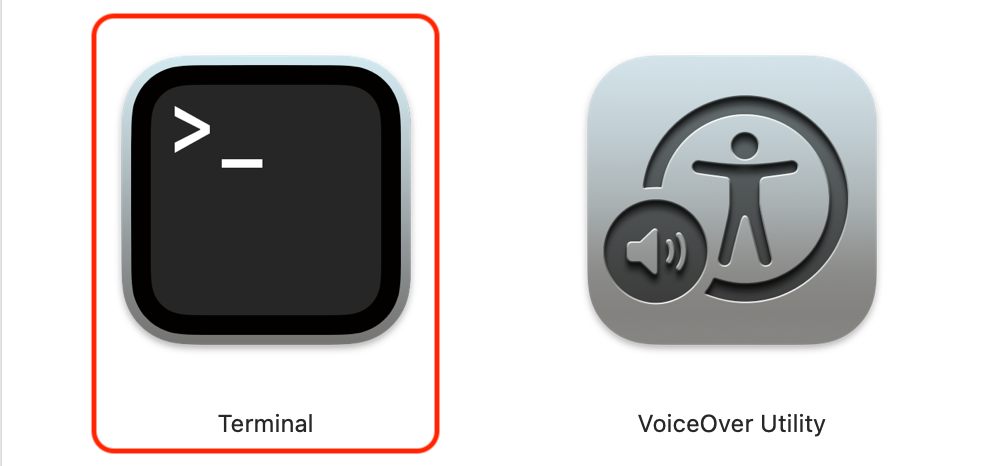
- Launch the Terminal app (go to Finder > Applications > Utilities and click Terminal).
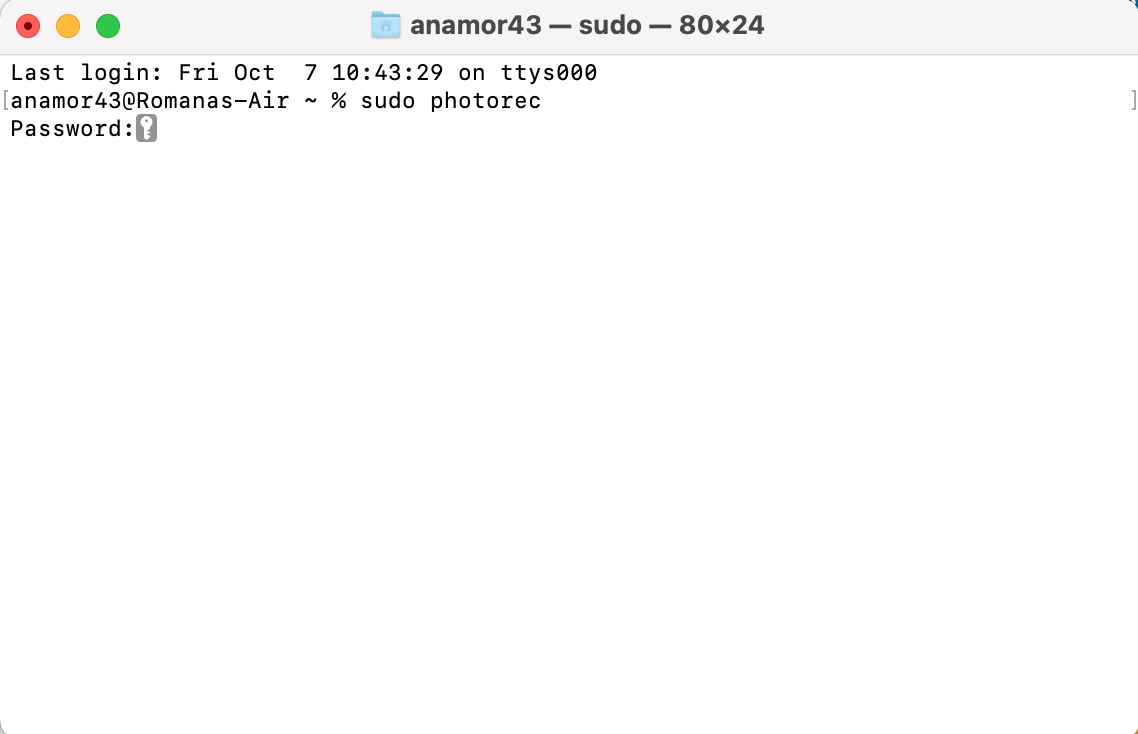
- Type in sudo photorec and hit Return (enter your admin password if prompted).
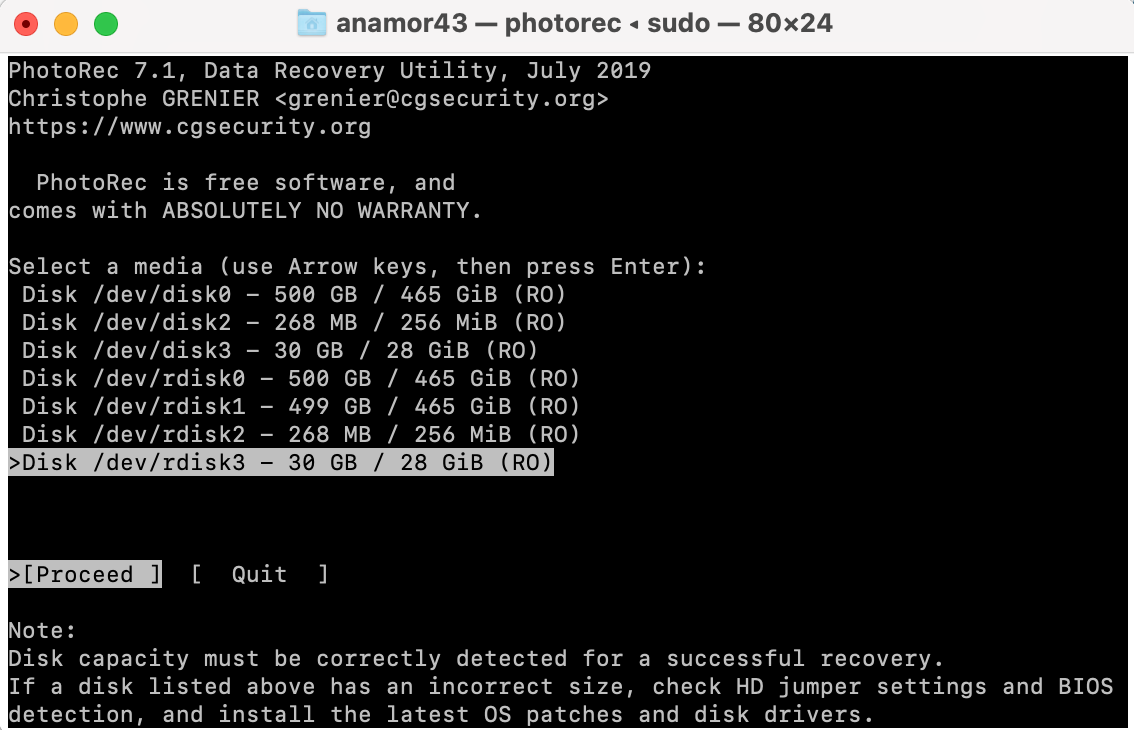
- Select your drive from the list of available devices and hit Return.
- Choose the needed partition and hit Return.
- To scan for deleted files, select Free. Or, for a more in-depth scan, choose Whole and hit the Return key.
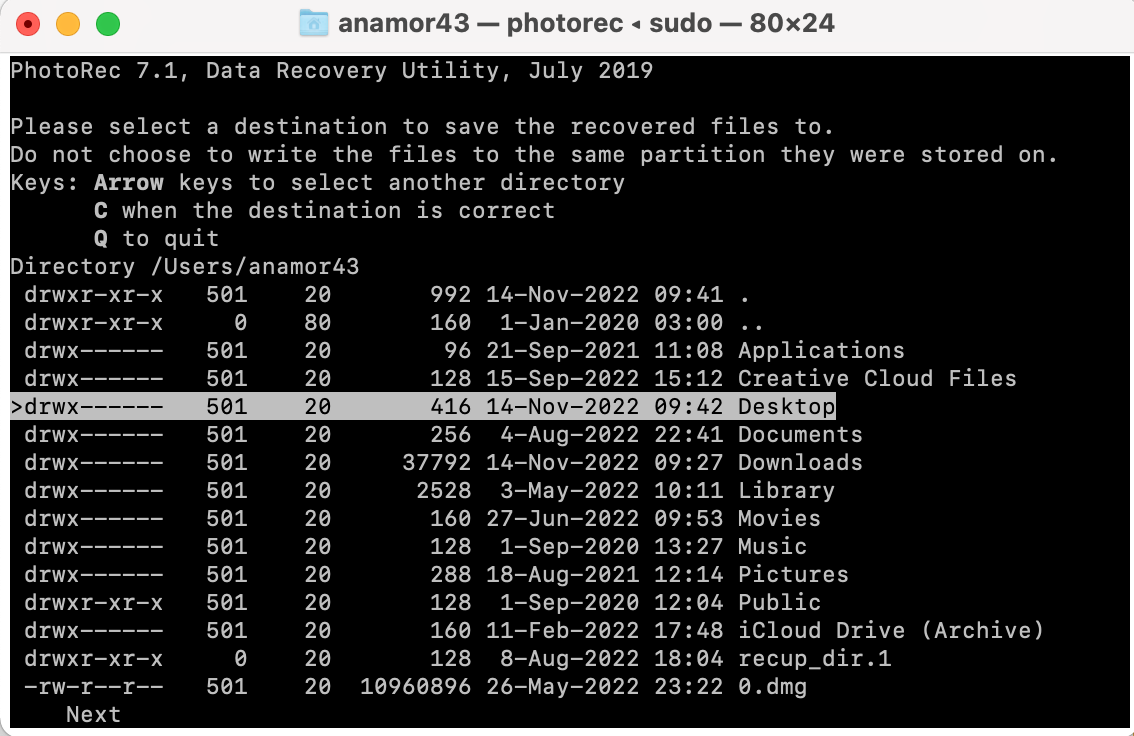
- Choose a preferred location for the recovered files and hit the C key to confirm.
Conclusion
Don’t give up on your deleted USB flash drive files until you try out the solutions in this article. We all know how stressful it is to lose an important presentation or a precious picture and think that it’s gone forever. Luckily, that’s where specialized data recovery software comes in handy. With their help, you should be able to effortlessly restore lost or deleted data from your USB flash drive in minutes.
FAQ
Once you delete a file on a USB flash drive on your Mac, it gets first transferred to the Trash folder on the computer and once the Trash gets erased, the file then disappears from the drive. So basically, you won’t be able to visually see the deleted file on your drive anymore. However, physically the file will still remain there until it gets overwritten by the file system with other data.
Yes, it’s possible to recover deleted files from a USB flash drive on a Mac. Your best options would be to either recover the data from a backup or use a specialized data recovery tool to scan the drive and retrieve the files.
You can recover missing data from a USB drive on a Mac using a specialized tool like Disk Drill:
- Connect the USB drive to your Mac.
- Download and install Disk Drill.
- Launch the app and choose the flash drive from the list.
- Click Search for lost data.
- Choose the files you wish to recover and click Recover.
It’s almost impossible to recover deleted files from a USB flash drive on a Mac without specialized software. The other option that you have is to use a backup to retrieve the needed files. But if you don’t have a backup of your drive’s files, the only other way to restore the deleted data is with the help of a data recovery tool.
If you can’t open the files on your USB flash drive because of file system corruption, the first thing that you should try is to use the Fist Aid feature in Disk Utility to repair it. It’s possible that once you do that, you’ll be able to gain back access to your data.
Here’s how to do that:
- Connect the drive to your Mac.
- Launch Disk Utility.
- Choose the drive from the list of available devices.
- Click the First Aid button.
- Click Run.
In case this doesn’t help in your situation, you can try to retrieve the needed files using a specialized data recovery tool. Disk Drill, PhotoRec, or R-Studio are good options for this job.